An introduction to audio production. Students will produce projects digitally that are designed to acquaint them with genres, styles and production techniques. Production planning, scripting, the use of sound effects, field production, multitrack recording, mixing and editing are covered.
An introduction to audio production. Students will produce projects digitally that are designed to acquaint them with genres, styles and production techniques. Production planning, scripting, the use of sound effects, field production, multitrack recording, mixing and editing are covered.
Instructor:
John C.S. Keston
Meeting Times and Location:
Monday / Wednesday, Room SCC 102 or SCC 201 3:25pm – 5:00pm
Equipment checkout / Adobe CC:
In order to checkout equipment required for this class you must first complete the liability form available at this link stthomas.az1.qualtrics.com/jfe/form/SV_3Q1E3d0Lbnjua1g. The liability form also has an option for requesting a temporary license for Adobe Creative Cloud. Check this option to have access to Adobe Audition on your own computer so that you can work outside of the media lab.
DIMA 262 Audio Production Glossary:
Use this audio production glossary to expand your vocabulary in regard to audio production and music technology. You might also use it as a study guide for the midterm quiz.
Session 1: Today we’ll discuss a few principals of sound itself. Sound is made up of high and low pressure waves that travel through matter. We can perceive sound traveling through air at frequencies ranging from roughly 20Hz to 20KHz, and are able to record it using microphones and analog or digital recording media. The frequency (rate or speed) of sound is measured in Hertz (Hz) or cycles per second. One cycle of a waveform includes one peak (high pressure) and one trough (low pressure). The amplitude of these sound pressure levels (SPL) is measured in decibels (dB). Let’s listen to sine waves at various frequencies to get a better understanding of how frequency and amplitude work.
What’s the difference between analog and digital recording? Analog recording translates the sound waves into an electromagnetic signal which is then stored on magnetically sensitive tape. Alternatively the waves are physically carved into record grooves for vinyl production. Digital recording encodes sound samples at intervals in time into numerical data. The rate of these intervals is called the sampling rate and is indicated in KiloHertz. The faster the rate, the higher the recording quality. The sampling bit depth indicates the resolution of the sample, or how the amplitude of the sampled sound wave is divided. CDs use 16 bit resolution and a sampling rate of 44.1KHz. The information is then stored on some type of digital media such as a hard drive in a computer, a CD, or a DAT (Digital Audio Tape) cassette.
Question: when you hear music from headphones plugged into a mobile phone, iPod, or computer is what you’re hearing digital or analog sound?
Next class: Please bring a set of closed ear (circumaural) headphones for our first exercise. The headphones will be necessary during studio time and outside of class to edit and mix your projects throughout the semester. As of August, 2023 there are nearly 6400 products on Amazon under over the ear headphones. I tend to lean toward trusted brands such as Tascam, AKG, Beyerdynamic, Sennheiser, and Sony. The inexpensive set linked below will do well.
Session 2: Today we will be gathering digital audio from an online source called Freesound, then using DSP to loop and manipulate a short segment of sound. Once we have downloaded the audio import into Adobe Audition where we will learn how to edit and process the sound. I will be demonstrating this process today.
Use Audition to edit a region or loop of audio that you want to work with. Make a copy of your region and apply pitch shifting and at least three more kinds of signal processing in order to come up with a new and completely different sounding loop. When you’re happy with the results bounce the audio to a new file and upload the unprocessed loop and the processed loop to Canvas (2 files). We will listen to the loops in class on so make sure you have finished your loops before Session 2, Week 2.
DSP or Digital Signal Processing is the manipulation digital audio within digital circuitry or software verses within an analog signal path. There are many different types of DSP. Each type is essentially a different algorithm with a set of user adjustable parameters used to manipulate digital audio. Some examples of DSP include level or volume adjustments, equalization or filtering, panning, looping, delay or echo, reverberation, time compression or expansion, and pitch shifting.
Description:
This assignment is an introduction to working with a DAW (Digital Audio Workstation) and discovering a few of the possibilities for manipulating sound with DSP (Digital Signal Processing). We will download audio from Freesound, import audio into Abode Audition, set markers for looping sound, trim the loop, and apply a minimum of three types of DSP including: pitch shifting, pitch bending, reverse, delay (echo), reverb, time stretching, time compression, phasing, chorus, equalization, and filtering. The length of your loop will be greater than one second and less than ten seconds. This exercise will be demonstrated in class.
Requirements:
1. Pick a sound of your choice from Freesound
2. Download the audio in WAV format at 44.1kHz/16bit or higher
3. Import the WAV file into Adobe Audition
4. Choose a segment of the audio between 1 and 10 seconds in length
5. Trim the audio to your selected range
6. Apply pitch shifting and a minimum of three other kinds of signal processing
7. Upload the processed loop and a “clean” version (no effects) to Canvas before class starts on Week 2, Session 2.
Points Breakdown:
2 points are awarded for selecting an interesting segment for looping
3 points are awarded for experimenting with signal processing
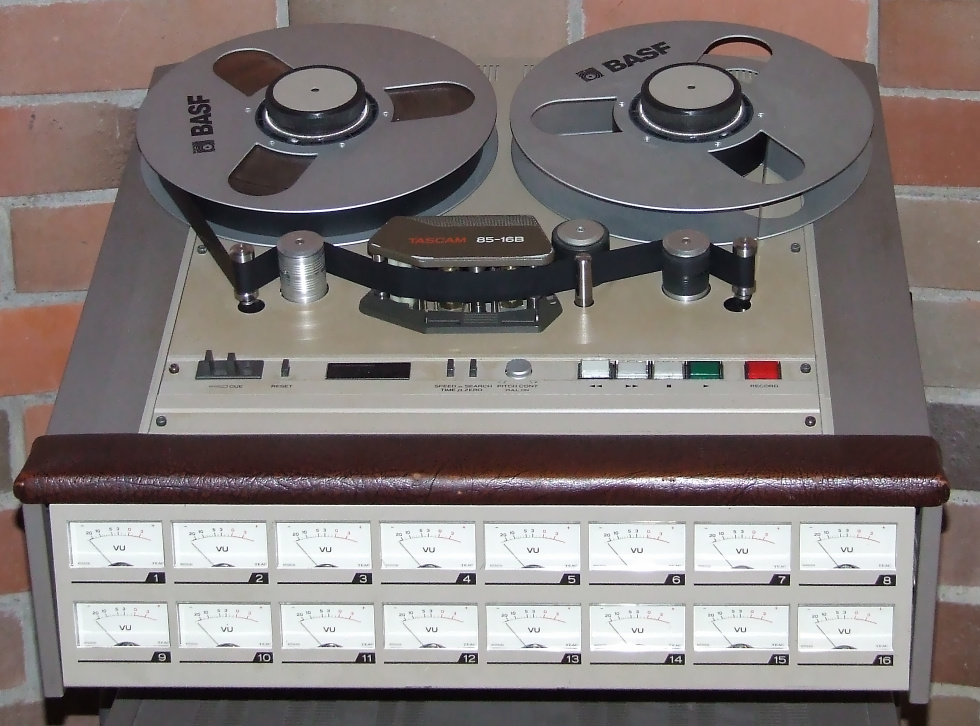
Session 1: Listening assignment. In class today we’ll listen to a selection from Miles Davis “In a Silent Way”. The track is called “Shhh/Peaceful” and is one of the recording industries first examples of looping. In 1969 digital recording was science fiction, so to accomplish looping the producer had to literally cut and paste sections of pre-recorded analog tape together and then play them on reel-to-reel tape machines. The results from this experiment were far reaching and today looping is used extensively in the recording industry.
Description:
Start a collection of sound effects selected from currently available libraries. Soon we’ll be recording our own sounds to give our productions more distinct character. Recording your own sounds is usually far better that using “needle drop”. However, on occasion it is necessary (and often safer) to choose sounds from an existing library. I generally suggest avoiding online resources, but FreeSound.org is a massive, collaborative, database of community contributed sound recordings. This online community licenses the content under Creative Commons, making the sounds legally available for most uses. Curate five sound effects from FreeSound.org and five more sounds from the DIMA SFX Library.
Make sure that five of the sounds are incidental and the other five are ambient. BE CHOOSY! There are far more bad recordings out there than good ones. Listen carefully with headphones and read the descriptions to get what you’re after. Good quality sounds on Freesound.org will generally have descriptions that share the microphones and other equipment used to make the recording. Avoid sounds with low recording levels or clipping. Post the link to the original Freesound file, and the original name of the DIMA SFX Library sound along with two to three sentences on Canvas about each sound and upload the files organized as a .zip. Use folders or filenames to separate the incidental sounds from the ambient sounds in the .zip file. See the demo videos for details.
Requirements:
1. Collect five incidental recordings from FreeSound.org
2. Collect five ambient recordings from FreeSound.org
3. Use Adobe Audition to edit each incidental sound to 5 seconds or less in length
4. Edit each ambient sound to 10 seconds or less in length
5. Write two to three sentences about each sound and share the link on Canvas
6. Upload the edited and zipped files to Canvas before class starts on Week 4, Session 2.
Points Breakdown:
2 points are awarded for presenting interesting incidental recordings
2 points are awarded for presenting interesting ambient recordings
3 points are awarded for editing and describing the sounds
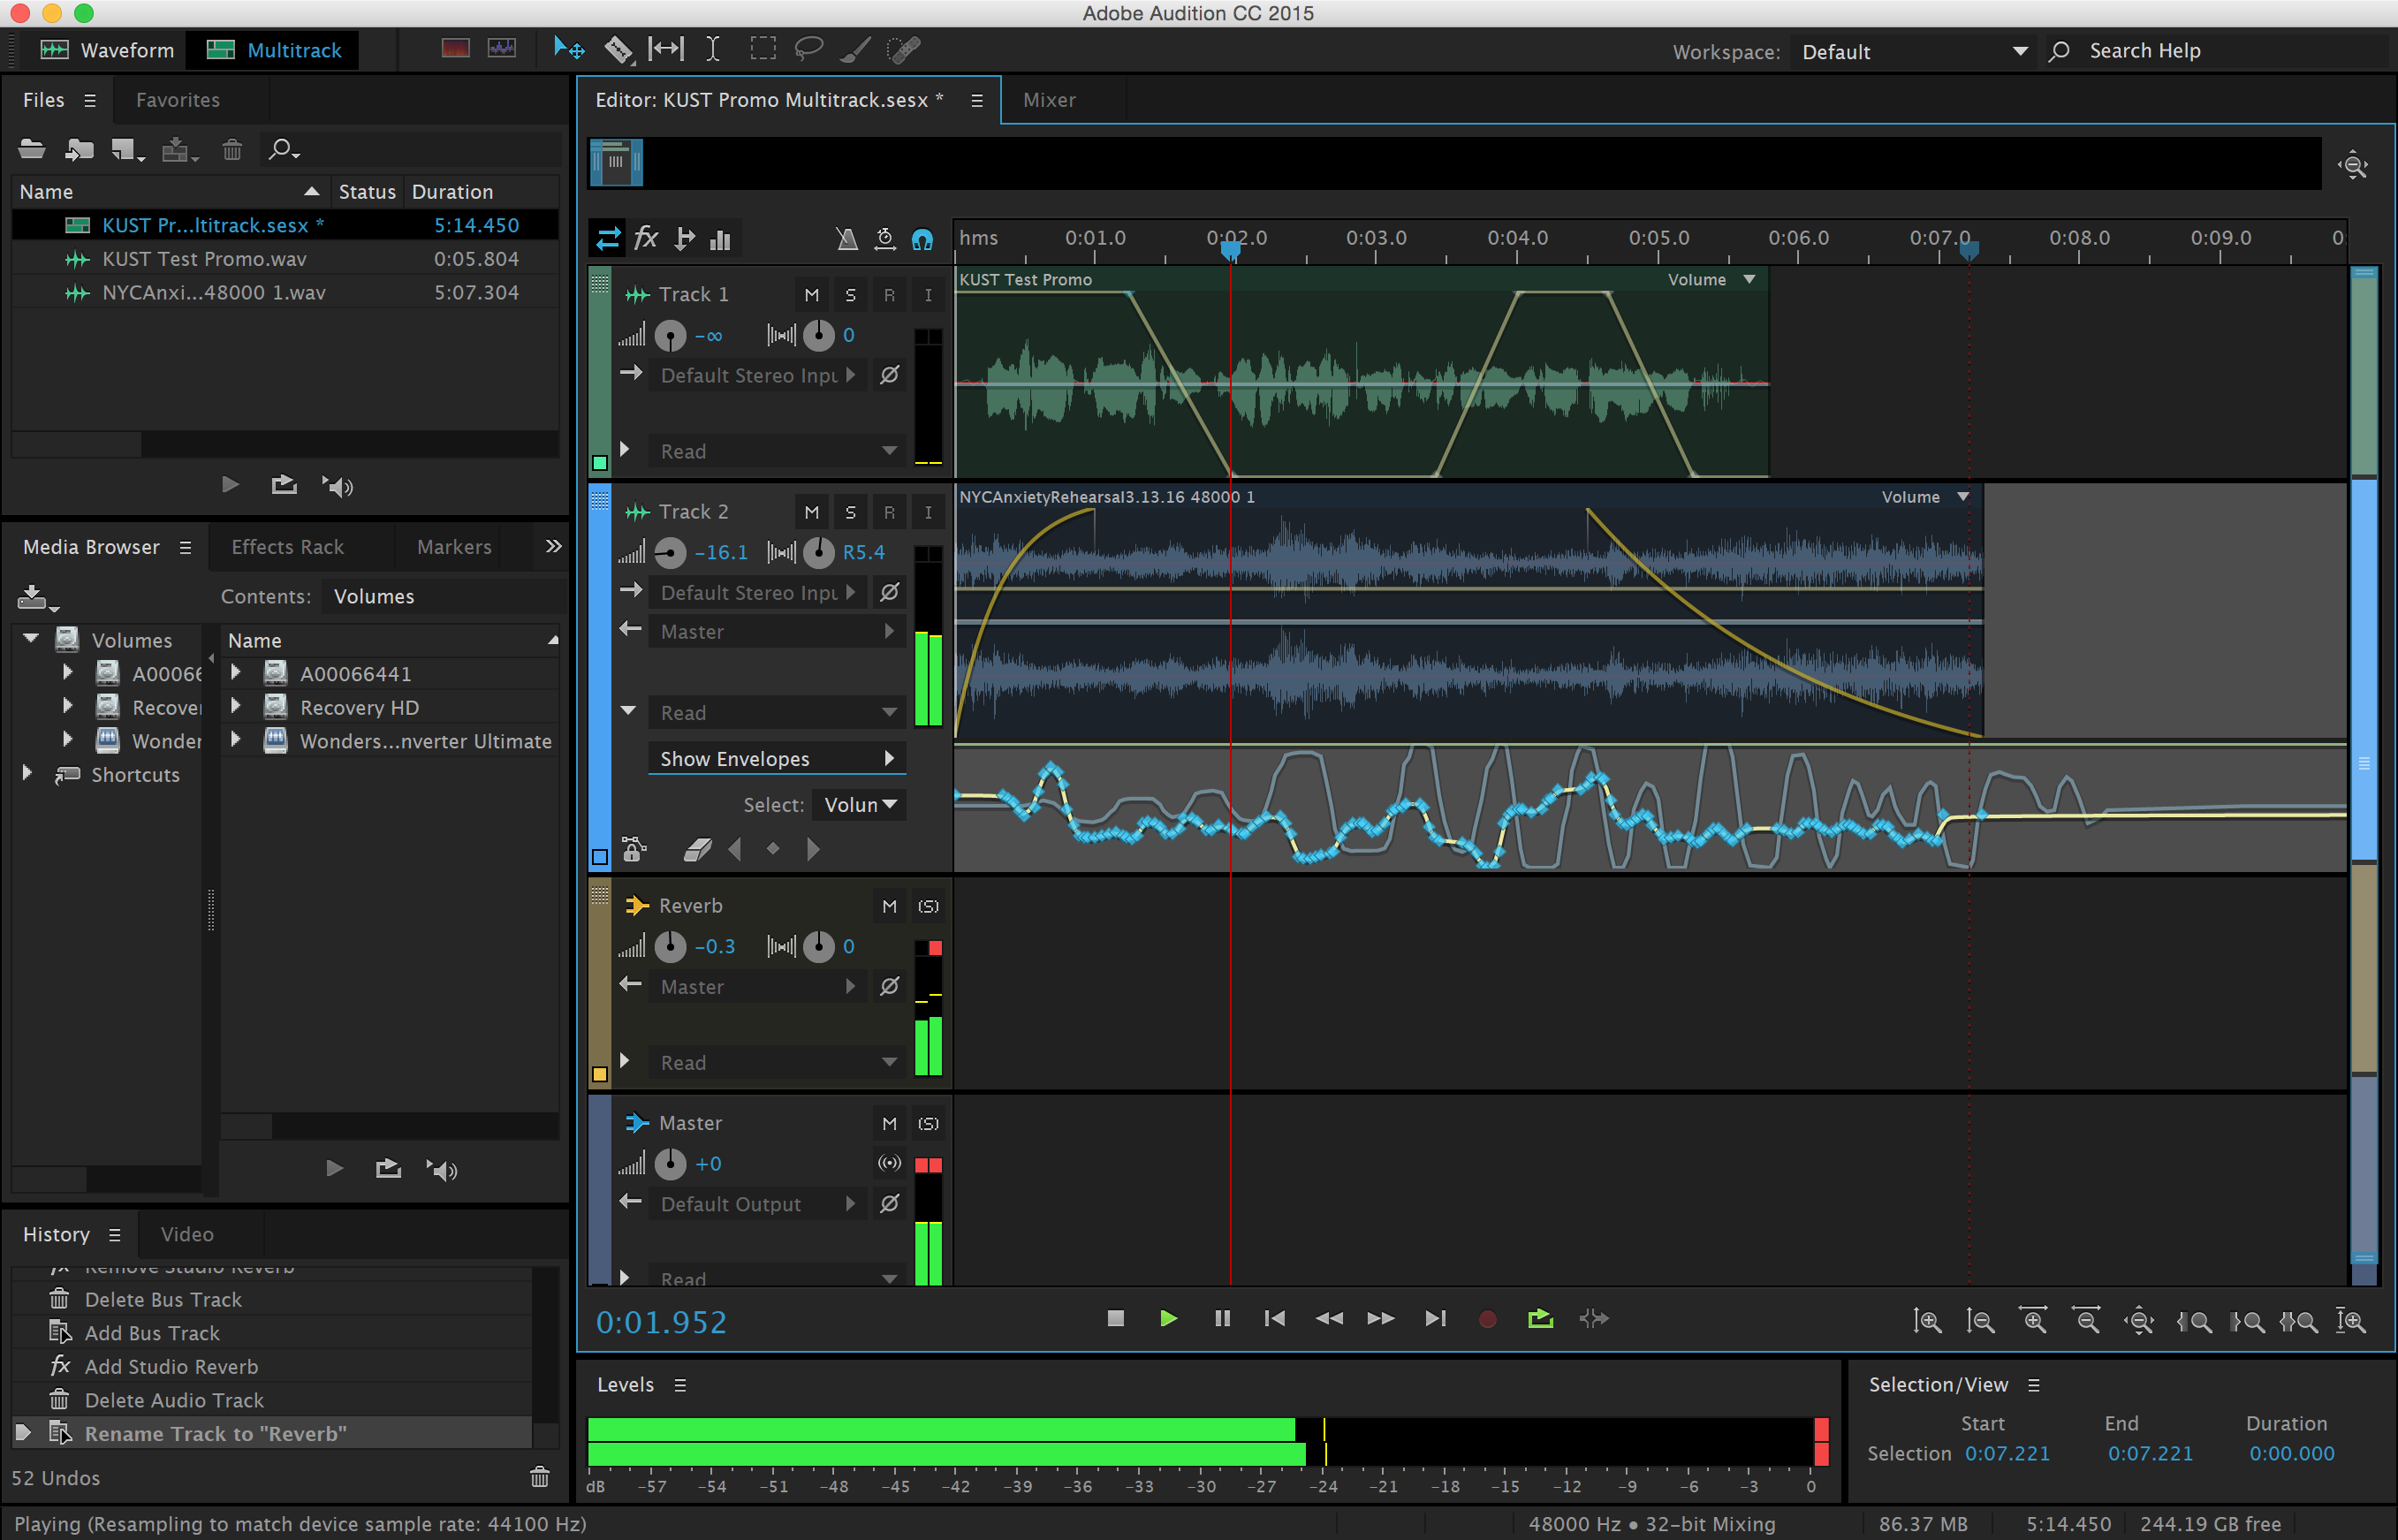
A note about rendering audio from Adobe Audition: Most of the assignments for this class require that you turn in a stereo, wav format file at a sample rate of 44.1KHz and a bit depth of 16-bit. This is the same as a standard audio CD. To render audio in this format from the “File” menu choose “Export” > “File”. In the dialogue box make sure that: 1) “File Name:” has a “.wav” extension, 2) “Format:” reads “WavePCM (*.wav, *.bwf)” and that “Sample Type:” reads “44100 Hz Stereo, 16-Bit”. Finally press “Ok” to render the audio file. It is important to understand that selecting a range in the “Waveform” view before exporting will only render that range. If you want to render the entire file, don’t select anything. Muting and soloing tracks is also reflected in the audio file when doing a multitrack mixdown.
Session 2: Let’s discuss how sound effects are used by audio industry professionals in radio, television, film, interactive games and online media. Let’s start the discussion by covering the distinction between ambient and incidental sound effects as requested for your upcoming “Needle Drop” exercise.
In the television and film industries incidental sounds are usually (but not always) considered diegetic sound. This means that the source for the sound is a visible event within the scene or its existence is implied by the setting. Doors closing and footsteps are typical examples of diegetic sounds. Ambient sounds are often (once again … NOT always) diegetic even though the sound source may not be visible. Things like traffic off in the distance, weather sounds, wind, and HVAC systems that contribute to the ambience of the space. Non-diegetic sounds neither have a visible source nor an implied source within the setting. Mood music, sound effects added to enhance a dramatic impact, and narration are all examples of non-diegetic sound.
In class exercise: As a group let’s make a list of ambient versus incidental sounds effects and identify them as either diegetic or non-diegetic.
The process of producing foley, field recordings, incidental, ambient, diegetic, and non-diegetic sound effects, are examples of sound design. Sound design includes a wide variety of categories. In addition to the former examples, sound designers produce sound for music, program patches for electronic instruments and synthesizers, produce sound for theatre productions, radio, podcasts, and online media, create audio for video games, and shape sounds using signal processing. Sound designers exploit sound spatialization techniques such as stereo, surround sound, binaural recording, and ambisonics to immerse the listener into the sonic environment. Recording and mixing engineers are usually responsible for ADR (automated dialog replacement), VO (voice overs), editing, processing and mixing.
Often the work of sound designers is comparatively low tech, especially when Foley is involved. Ironically, in the 3D animated film WALL-E, Academy Award winning sound designer, Ben Burtt, taps on a slinky to create laser gun sounds and other mechanical techniques, like the classic thunder sheet, to create sounds in the tradition of Disney.
Session 1: This week will will be focusing on the details of audio production using Adobe Audition. We will be discussing mixing layers of audio and processing sound using automation. How to adjust signal levels, prevent clipping, noise reduction, signal flow, equalization, solo/mute, and routing audio to effect buses and the master track will be some more of the the topics we’ll be discussing. Exercise 3 is designed so that you can practice these techniques.
When we make recordings or amplify sound the signal travels through various stages of electronics before it is output or converted to bits and stored in electronic memory. The journey the sound takes is called signal flow. A simple example is microphone to XLR cable to mixer gain stage to mixer eq to mixer mains to power amplifier to monitors. Each stage has an audible impact on the signal until it is reproduced. These impacts can result in good or bad consequences!
Description:
For this exercise we will begin to make use of signal processing to improve the realism and believability of incidental and ambient sounds. This is also the last time that we will rely on pre-recorded sound effects. Use FreeSound.org to find footsteps, wind, a door closing, and a fourth event of your choosing (water pouring, breathing, breaking dishes, etc.). Produce and layer the sound effects to sonically illustrate the following scene:
As wind howls, footsteps move across a room from left to right and stop just before a door is slammed shut. As soon as the door closes the wind noise dies down considerably. The footsteps then move away and to the left where a final sound occurs. Perhaps the character trips and falls, or breaks a glass. The end of the story is for you to decide.
In order to achieve the scene, panning, volume, and reverb automation will need to be applied. It will also be necessary to layers multiple tracks of audio because the footsteps, wind, and door shutting will all have to play at once. See the demo videos for instructions on applying automation in Adobe Audition to a multitrack production.
Requirements:
1. Collect the recordings required for the scene from FreeSound.org
2. Arrange the sounds into layers that sonically illustrate the scene
3. The piece should last no less that 20 and no more than 30 seconds
4. Use automation in Adobe Audition to pan, mix, and spatialize the layers
5. Add an ending sound of your own choosing to finalize the piece
6. Render the audio to a stereo .wav and upload to Canvas before class starts on Week 5, Session 2.
Points Breakdown:
2 points are awarded for arranging the recordings into the scene
3 points are awarded for processing the tracks using automation
2 points are awarded for getting the sounds to work well together
1 point is awarded for finding an interesting closing sound
Every U.S. president since Lyndon B. Johnson has delivered speeches through an SM57. It became the lectern microphone of the White House Communications Agency in 1965, the year of its introduction and remains so. –Wikipedia
Session 2: What are dynamic microphones and how do they differ from condenser mics? How do you choose the right mic for the right situation? How do microphone polar patterns effect he response of the mic? These are some of the questions we’ll be answering during lecture. After lecture we will be demonstrating the audio qualities of some of the different microphones that are available for checkout by making some test recordings. Ironically microphone technology has changed little since the 1950’s. In fact vintage microphones are often hoarded by engineers looking for particular characteristics. In contrast recording technology has changed dramatically since digital recording was introduced in the late 70s, and as computer processors get faster and digital storage becomes more economical.
Knowing about the different types of microphones and how to use them is crucial to engineering high quality audio recordings. Dynamic microphones such as the Shure SM58 and SM57 are very durable and excellent for recording loud signals such as close miked drums, guitar amps and so on. More sensitive condenser mics such as the Shure KSM32 or AKG c4000b are excellent for capturing the nuances in voices and quieter acoustic sounds. Vintage ribbon microphones are sought out for detail in the high frequency range, but they are delicate and can be damaged by phantom power. Modern ribbon mics are more durable.
Other mics include lavaliers or “lapel mics” that are small condensers typically attached to clothing for recording voice during interviews and television broadcasts. Ambisonic and binaural microphones capture sound in three dimensions.
Now that you have a basic understanding of microphones it’s time to start experimenting with them. This brings us to the Field Recording Project. Many factors complicate recording sound in the field. Ambient sounds, wind noise, weather, dead batteries, and equipment malfunctions are just a few. Always have extra batteries for the recorder and any mics that need them. Consider having a backup field recorder and microphones for when things break. Bring wind screens and blimps to suspend shotgun mics. Be aware of phase cancellation when recording in stereo! Use the XY technique to prevent phase cancellation.
Description: Use the Tascam DR-40 field recorders to record five incidental sound effects and five stereo ambient sounds each. Seek out sounds that are unlikely to be duplicated by your classmates. Think of unique environments that you frequent or encounter on occasion. Feel free to manufacture the incidental sounds by striking, dropping, or rolling objects. Be creative. You may use your own voice to create effects. Shutting doors, stomping on floors, breaking glass or hammering on pots and pans are a few examples of creating sound effects.
Work with a partner so you have an extra set of hands and ears to capture your recordings, but do not submit the same recordings as your partner. Trim the ambient sounds to between 10 and 20 seconds. Your incidental recordings will each be under 10 seconds long. Compress all ten .wav files into a .zip archive and upload them to Canvas before class begins on Session 2, of Week 6. We will be listening to some of the sounds that you have recorded in class.
Insure the quality of your recordings by doing the following:
1. Monitor the recordings as you make them using your circumaural headphones to make sure they are not too quiet, not distorted at all, and not capturing wind noise.
2. Use windscreens (sometimes called dead cats or blimps) on your microphones when outside, even if there’s very little wind. The microphone diaphragms will create significant unwanted noise and distortion at the slightest amount of wind. Walking while recording without a windscreen may even cause too much wind.
3. Make sure that your recording levels do not exceed 0db causing unwanted distortion. This can be done by viewing the meters on the DR-40. It is also possible to hear distortion while monitoring your recordings on headphones, but this may be difficult and requires practice.
4. Get as loud of a recording as possible without distortion (exceeding 0db). If your recording is too quiet you will have to boost it afterward thereby reducing the bit depth and dynamic range of your recording. Boosting your recording also means that you will be making any noise that was captured in the recording louder, further reducing the quality.
Requirements:
1. Record five incidental sound effects of your own with your partner
2. Record five ambient environmental sounds of your own with your partner
3. Edit each incidental sound to 10 seconds or less in length
4. Edit each ambient sound to between 10-20 seconds in length
5. Write two to three sentences about why you chose the sounds and how you recorded them on Canvas
6. Upload the edited and zipped files to Canvas before class starts on Week 6, Session 2.
Points Breakdown:
3 points are awarded for presenting interesting incidental recordings
4 points are awarded for presenting interesting ambient recordings
3 points are awarded for editing and describing the sounds
Session 1: Today we will discuss and demonstrate a few “best practices” for layering multiple tracks of audio. For example it is critical to avoid clipping and keep noise to a minimum. When looping try to find “zero crossings” within the wave to avoid pops. Cross fades can also help prevent pops or be used to extend the length of ambient layers. Use panning, volume, equalization, and reverb to “place” individual tracks within the mix. Create an “effects bus” for processing that should be consistent from one track to another, such as reverb. Finally, session management is an important factor for dealing with multitracked documents. Usually the DAW points to audio files versus embedding them in the session file. This means that all of the audio files associated with the session must be accessible each time the session is opened.
Plugins/Effect Rack: For our first exercise we applied processing with “destructive” editing. This techniques manipulates the selected audio and creates a new waveform which replaces the original audio on the track. The advantage of applying effects destructively is that the processing happens only once and does not continually tax the CPU of your computer. The disadvantage is that the processing is destructive; unless you undo or revert to the original, you cannot easily return to the previous state or adjust the effect once it’s applied. This is why it is much better to use non-destructive DSP plugins using the “Effects Rack” in Audition for your projects. Plugins applied in the Effects Rack are processed in real-time so that you can make adjustments to the effect as you listen to the track, temporarily disable (bypass) the effect, or remove the effect completely without having to revert to the original audio.
Description: The Multitrack Production Project involves layering a minimum of five tracks of audio into a comprehensive piece at least one minute long. Process each track non-destructively using equalization and other forms of DSP so that all of the tracks work well together and don’t sonically interfere with each other. Your piece can tell a story, like a radio drama, podcast, or radio advertisement. You may prefer to create a sound-scape that creates a mental picture or scene by combining ambient and incidental sound effects.
Requirements:
1. A minimum of five tracks are required. It is likely that you will use more than five tracks, and it’s also likely that no more than five will play simultaneously.
2. Timing (when and how sounds enter and exit during the piece) is an important factor. Try and space sounds naturally. Allow the listener to form a mental picture from what they’re hearing.
3. Use volume, panning, and reverberation to mix and spatialize sound layers. Automate panning to create movement on the x axis and automate the reverb mix (dry / wet) to position sound forward (dry) and back (wet).
4. Apply at least three different types of DSP in addition to reverb as non-destructive track effects in the “Effect Rack”. The effect rack gives us the ability to modify the processing in real-time, hearing the changes immediately. You can also bypass an effect to compare the sound to the original audio.
5. The length should be at least one minute. The overall length is not as important as the quality, so slightly shorter pieces are acceptable as long as all other requirements are met.
6. Audio recorded with microphones, including dialog, is required. Whenever you can capture sounds of your own, do so. Sounds you record have a unique quality that cannot be found when using prerecorded sound effects. However, please don’t try to record sounds that are dangerous to produce like fire, accidents or explosions.
7. Upload the edited and zipped files to Canvas before class starts on Week 8, Session 2 when we will be presenting your projects for in-class critiques. Please include 2-3 written paragraphs explaining your concept, production, and post-production processes on Canvas.
Points Breakdown:
5 points are awarded for the quality and arrangement of the recorded tracks.
5 points are awarded for your use of automation, processing, and the mix.
4 points are awarded for the creative content, style, and tone of the piece.
1 point is awarded for sharing your piece during the in-class presentations.
Session 2: The Needle Drop Library exercise is due today. Please make sure that all your sounds are on Canvas so that we can listen to some of your selections in class. Mainly, today we will be learning how to use the Tascam DR-40 recorders in group lessons. Be prepared by bringing your circumaural headphones. You may also consider bringing a personal SD card to capture you recordings during the lesson.
Session 1: Today we’ll be listening to an episode of the podcast series Radio Lab titled Shorts: Proof. While listening, pay particular attention to the audio that has been meticulously produced for this episode. Not only is the storytelling superb, but also the sound design is of outstanding standards. Be prepared to discuss specific examples from the audio after listening to the episode. While listening please answer the questions listed below for discussion after the exercise has been completed. This in-class exercise will apply to your participation grade.
1. Describe a minimum of three incidental sound effects used in the episode. Are the incidental sounds typical of radio productions?
2. Describe a minimum of three ambient sound effects used for backgrounds. How are these sounds used to illustrate the environments?
3. Describe one way that the dialogue has been processed. How does the processing impact story?
4. How do music and other non-diegetic sounds play a role in the piece?
5. How would you characterize the overall quality of the sounds effects, dialogue, and production? How much effort do you imagine was put into the audio for the episode?
Multitrack Project Milestone #1
Due: Week 6, Session 1
1. Be prepared to discuss your Multitrack project plan
2. Start by detailing the concept of your project
3. Outline examples of the sounds you plan to record
4. Specify examples of incidental sounds, ambient sounds, non-diegetic sounds, and dialog
5. List examples of the processing you plan to apply
Also, please share your ideas for your Multitrack Production Project. Are you planning a podcast or radio documentary? Or, does your project tell a story? Perhaps you’re more interested in experimenting with soundscapes and processing to create an atmosphere or environment. The most important thing is that your tracks work well together. Today I would like to hear from you on what you have in mind. Also, let me know if you’d like to get some feedback on anything you have produced so far for the Signal Processing Exercise or Field Recording Library.
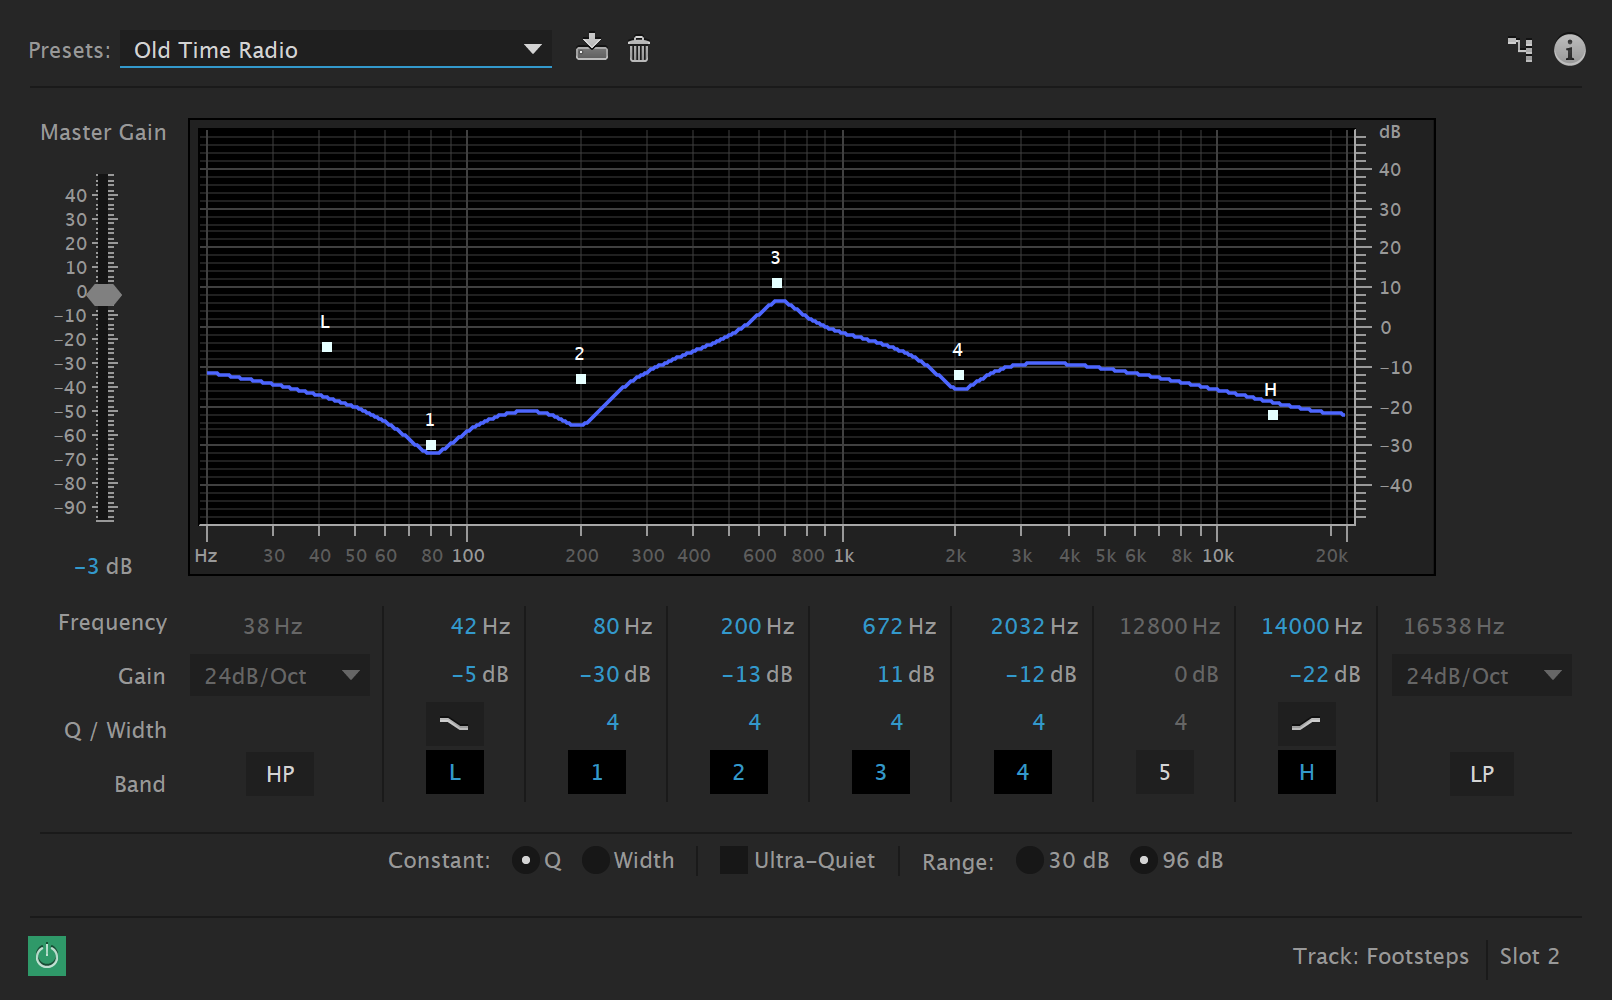
Finally let’s take a good look at Equalization. Equalization, or EQ, is critical when mixing multiple tracks of audio together. Layering sounds with similar frequencies can often cause a “muddy” mix unless each track is tailored with EQ to work well together. The following article has an excellent explanation of a few different types of eq filtering.
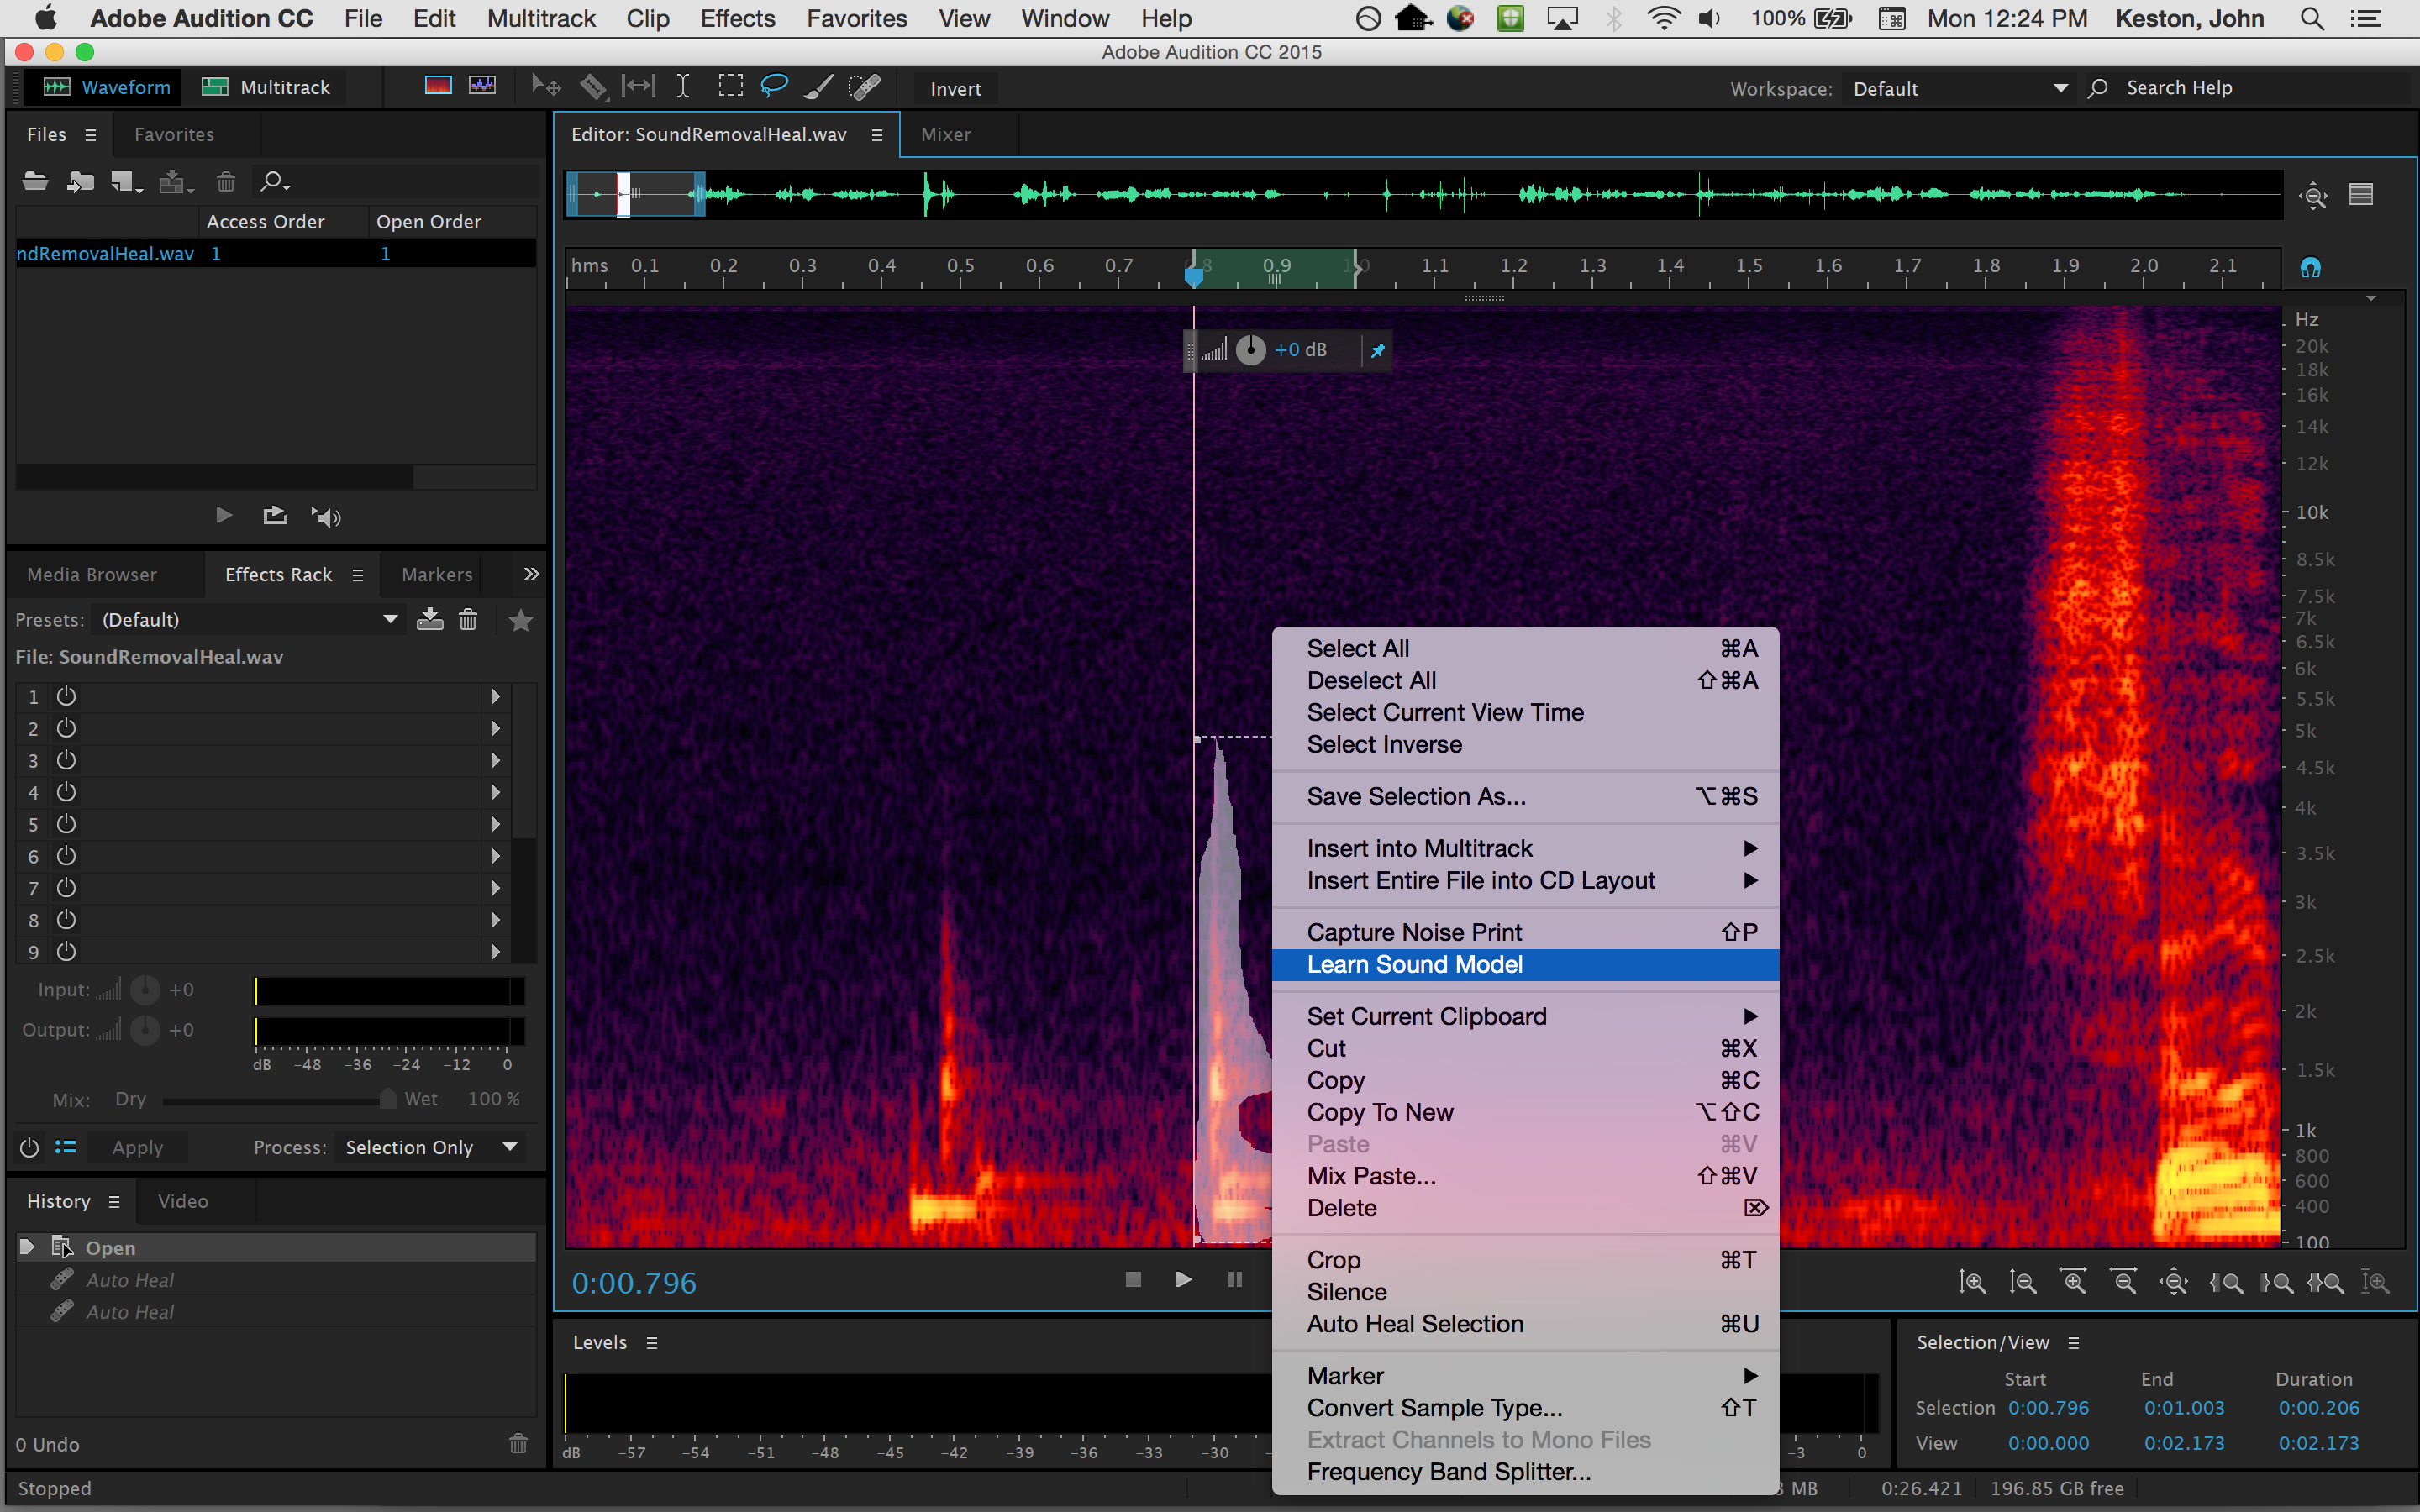
Session 2: This week we’ll start looking at ways to use Adobe Audition’s noise reduction techniques. One of my favorite sayings is, “garbage in garbage out”. In other words it is important to start out with the best possible quality in your recordings. If you can retake recordings that have excessive noise or intrusive ambient sounds then by all means retake those recordings under better conditions or circumstances. In some instances you may have a recording that is impossible to re-record. In these cases your sound might benefit from applying noise reduction. Audition is one of the best applications available for reducing noise without leaving behind artificial sounding artifacts. This week I will demonstrate a few of these techniques.
Also, today the Signal Processing Exercise is due. Please make sure that it is uploaded to Canvas before class starts so that we can listen to a few of your exercises in class today. A week from today the Field Recording Library project is due. During studio time today I will give you feedback on your sounds so far. Note: Please have a minimum of one incidental and one ambient example on hand for feedback.
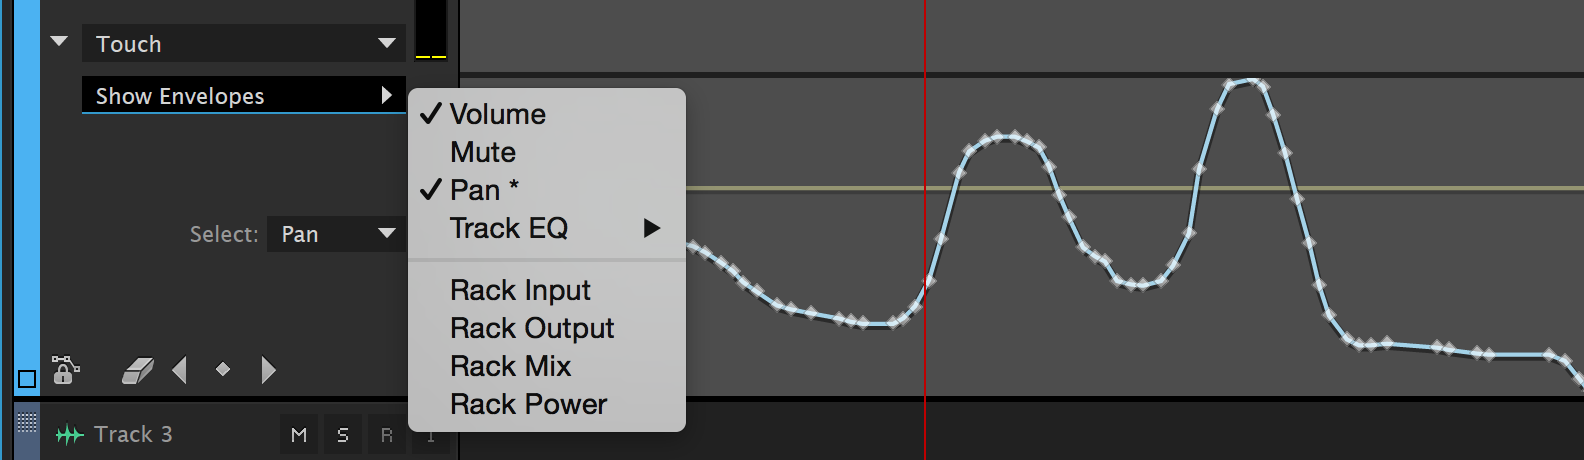
Session 1: Let’s discuss and experiment with bus sends and automation lanes. In Audition automation lanes are referred to as envelopes. Using envelopes we can adjust virtually any parameter you can imagine over time. These adjustments can be made with key frames and lines to ramp from one value to another. Alternatively you can capture the movement of controls into the envelopes and reproduce the performance during playback. In today’s demo I will explain how to use envelopes and why they are important for multitrack mixing.
During studio time today please be prepared to discuss your Multitrack Project concept as described in the Multitrack Project Milestone #1 last week. Also, today will be the last opportunity for questions and feedback on your Field Recording Library Project which is due next class.
Multitrack Project Milestone #2:
Due: Session 1, Week 7
1. Show that you have a minimum of three tracks in your Audition session
2. Demonstrate the use of EQ on one or more tracks
3. Demonstrate the use of effects sends on one or more tracks
4. Enable at least one example of automation in your work in progress (panning, volume, or effects level)
Session2: Today we will be listening to examples that you choose to present from your Field Recording Library. Explain what drew you to the sounds you recorded. What techniques and equipment did you use to record them?
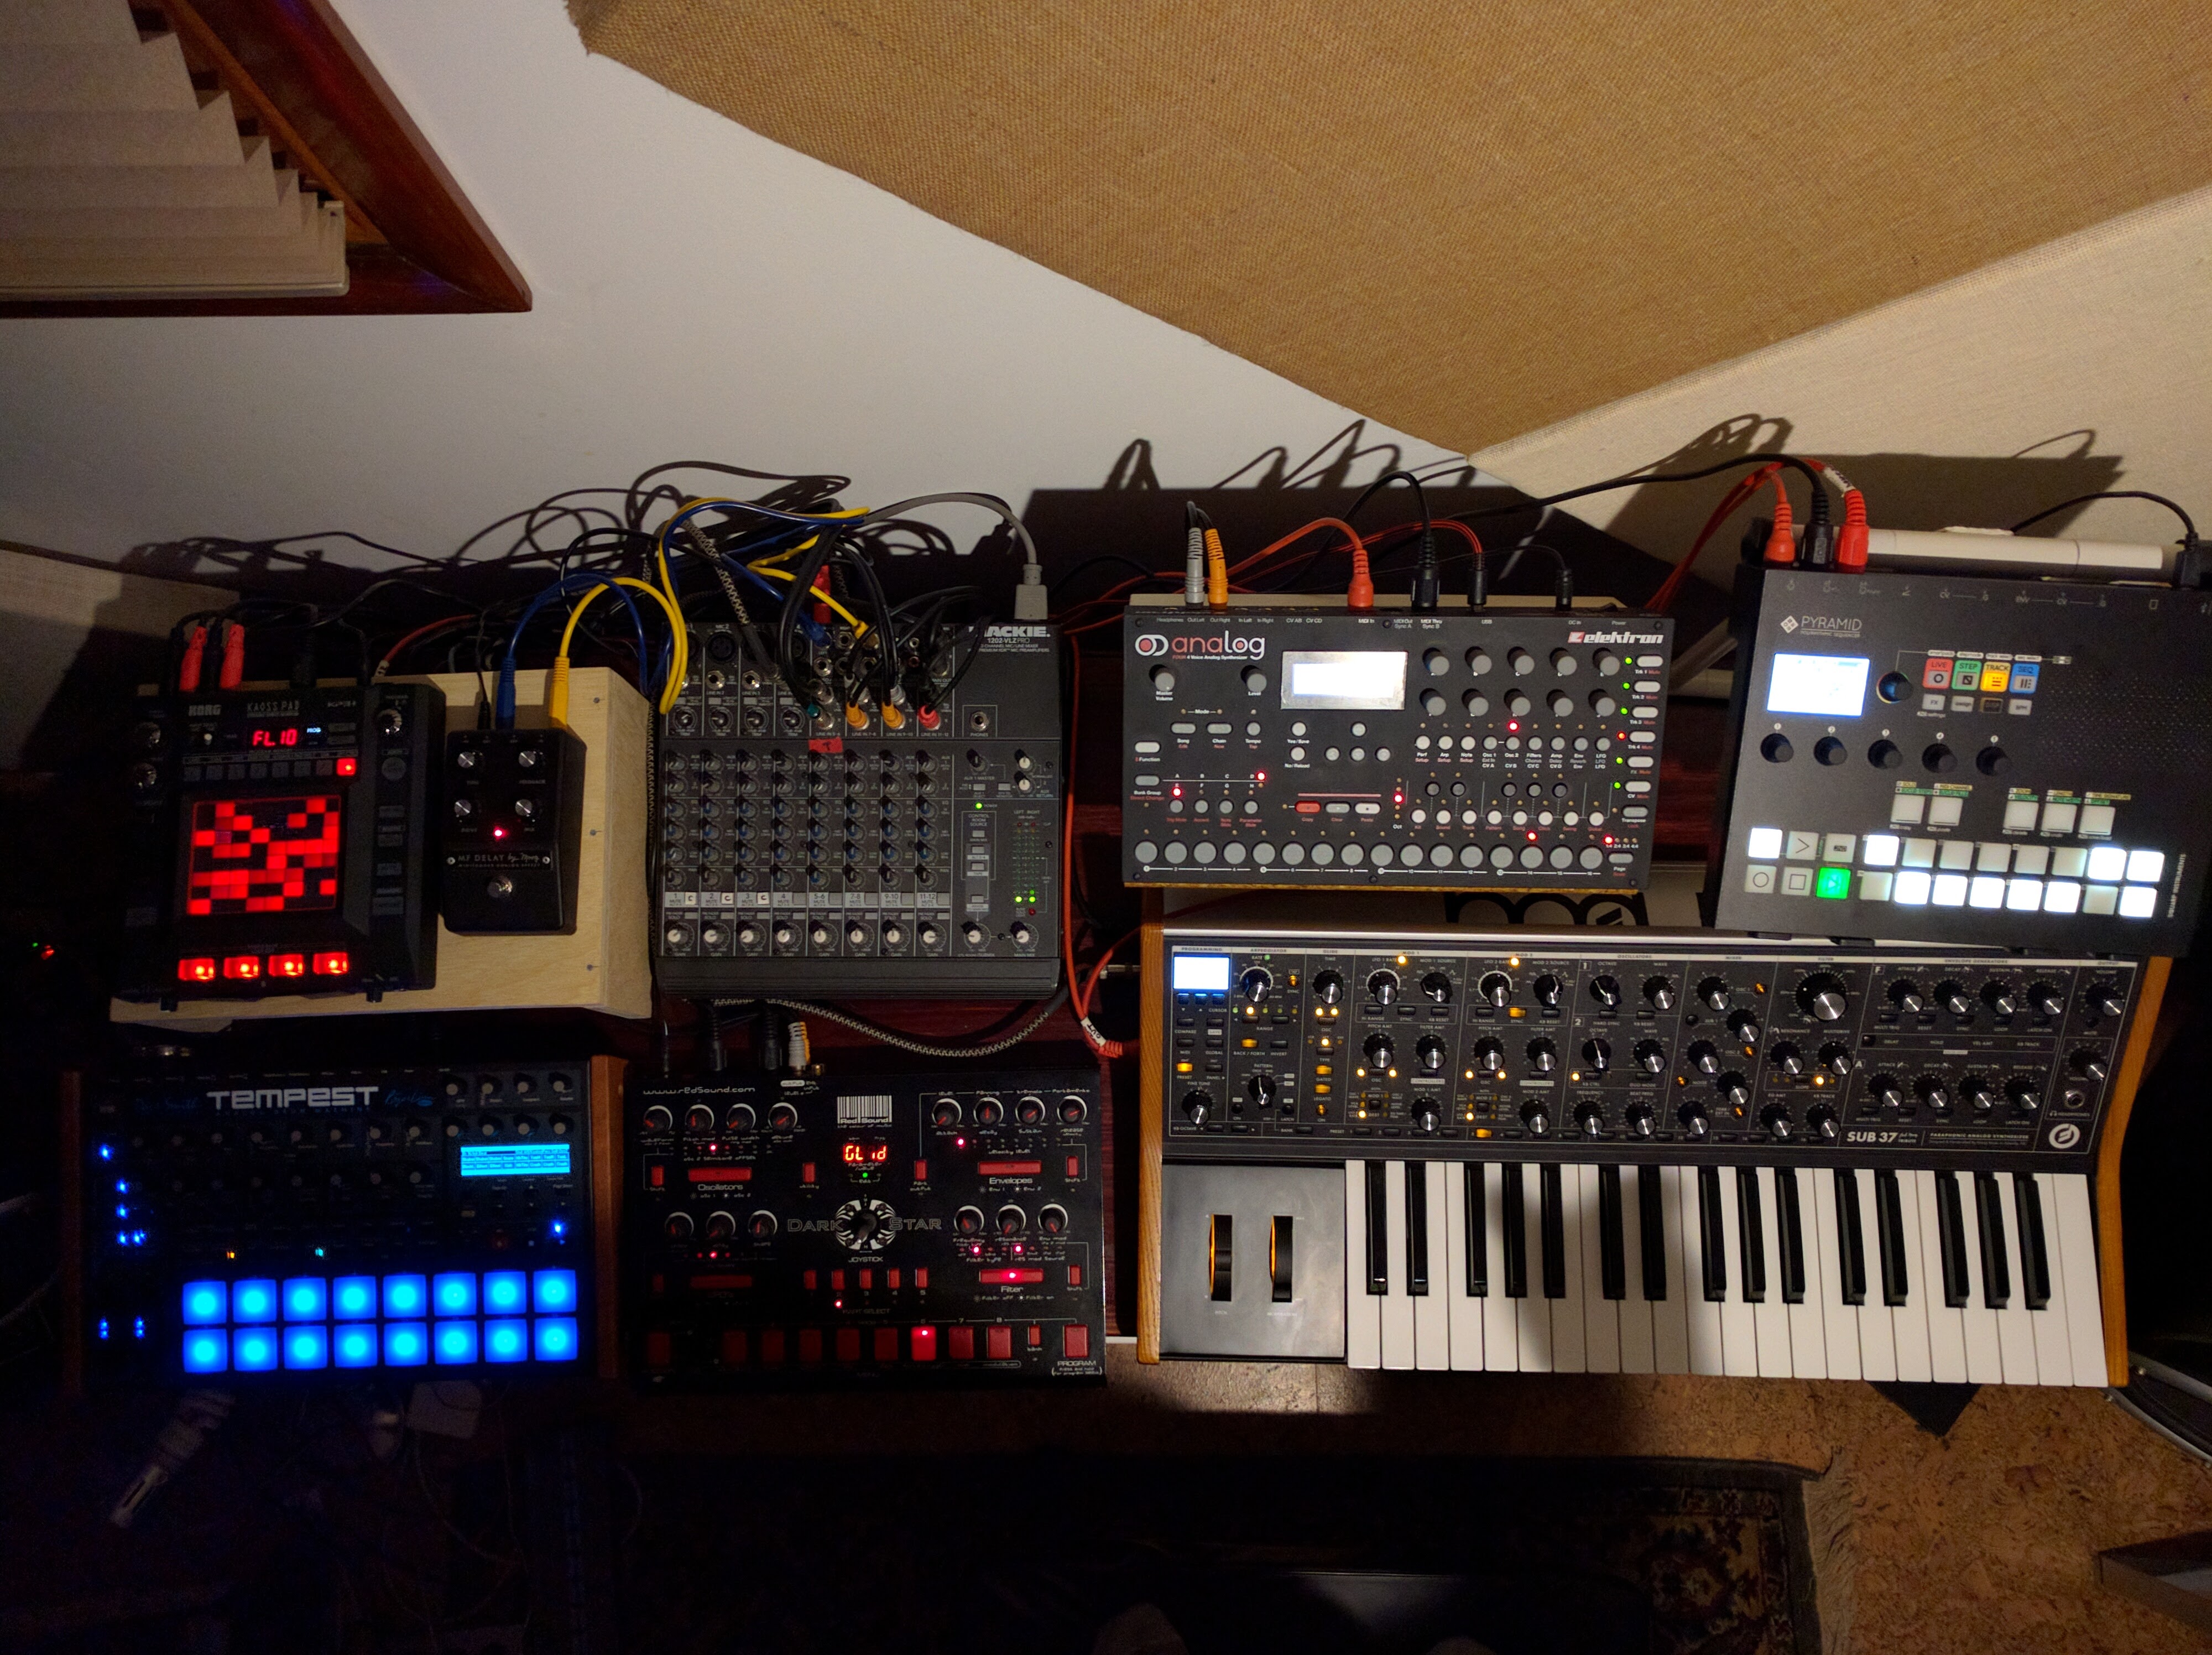
Isao Tomita surrounded by pre-MIDI era modular synthesizers
Next we will discuss the MIDI File Music Production project. This project will give you the opportunity to produce royalty free music that you might use in final project or future productions without the worry of licensing fees or copyright infringement. Adobe Audition CC does not support MIDI. Fortunately there are plenty of alternatives that do. Next week we will investigate a couple of applications and techniques for reading MIDI files and producing unique tracks based on the data contained within them. For now let’s talk a little bit about MIDI and discuss the requirements for the project.
MIDI (Musical Instrument Digital Interface) is a data protocol for music. It has existed, virtually unchanged, since the early ’80s when it was developed to allow electronic synthesizers from different manufacturers to control and be controlled by each other. MIDI has far exceeded its expectations at conception. Soon after its development software was developed to use the MIDI protocol to sequence music on computers. This led to a General MIDI Standard in 1991 so that files containing MIDI data could sound similar from one device to another. A few years later the Internet was flooded with MIDI files. The small size of MIDI files made it possible to download and play them on mobile devices as ring tones. These days, most ring tones are sample-based digital audio, but the Internet still holds a vast repository of MIDI files from a broad array of musical styles.
Project 3: MIDI File Music Production Project Due: Session 2, Week 11 (10 points)
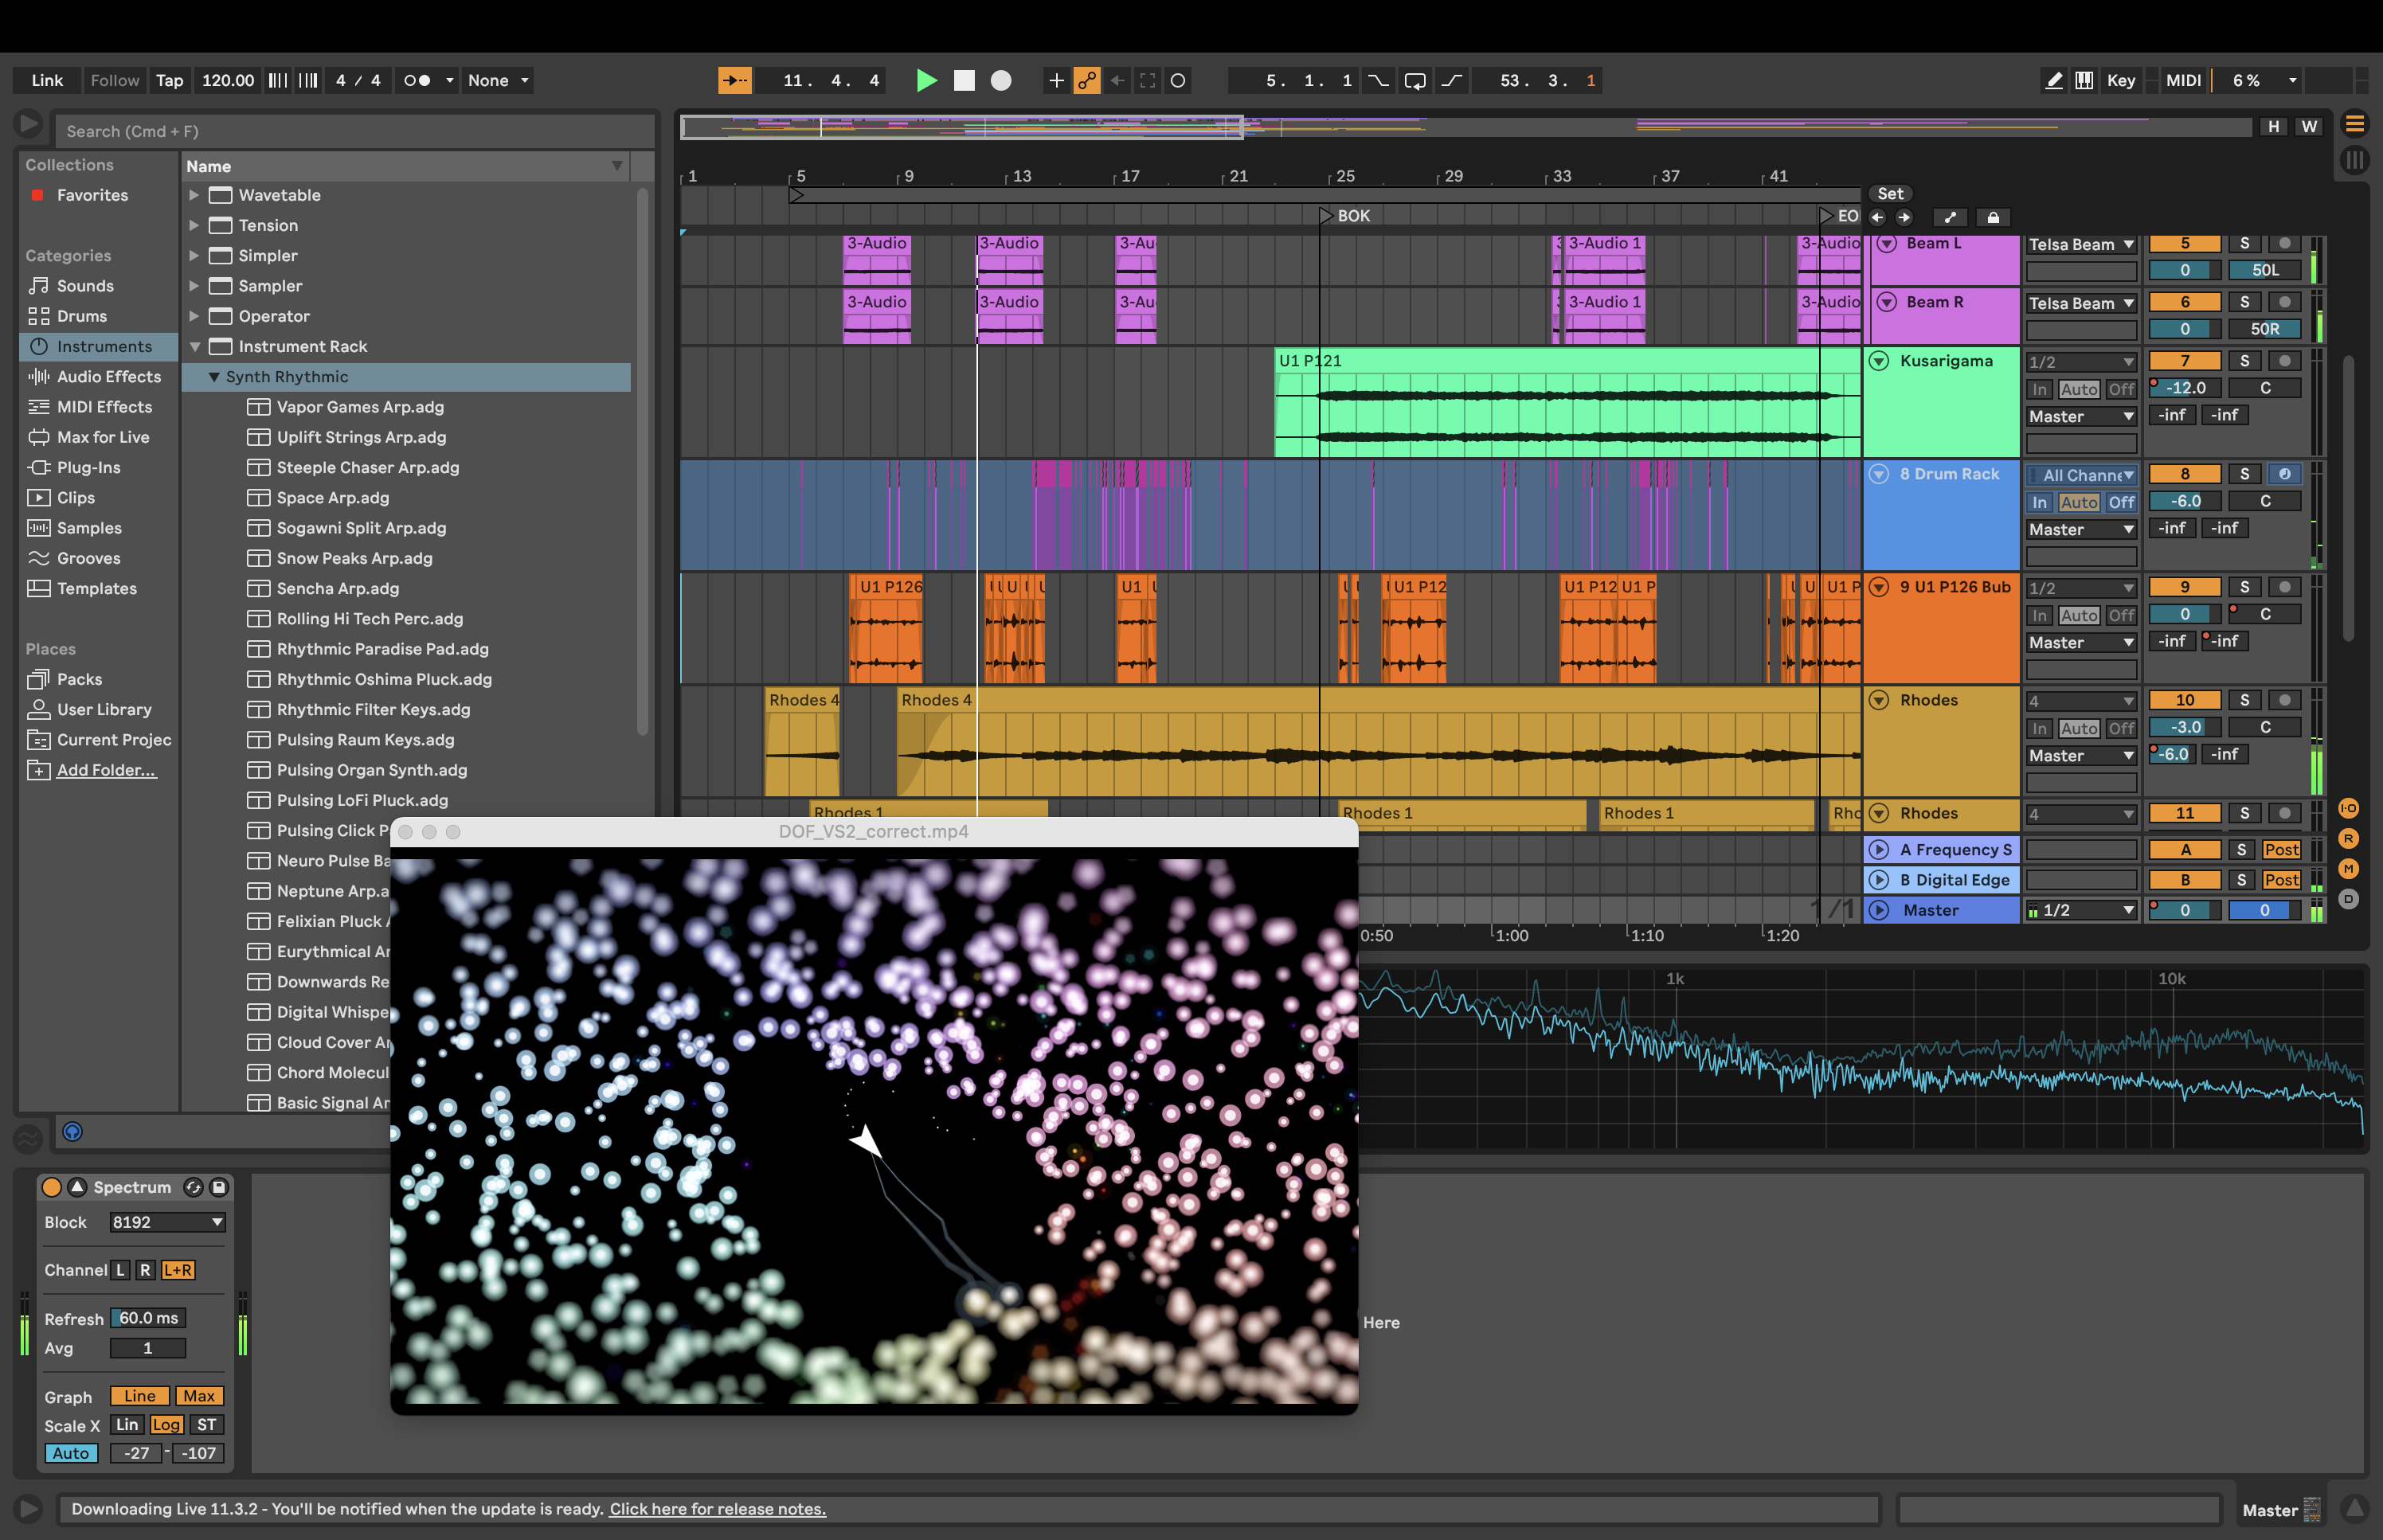
Description: The MIDI File Music Production Project is an opportunity to produce royalty free music based on pre-existing MIDI files. It is also a chance to experiment with sound design techniques that are available through the use ofvirtual instruments. You do not have to be a musician to do this! Use Ableton Live (a 30 day trial version is available here) to import a MIDI file of your choice and produce the instrument sounds and processing for each layer. Find a MIDI file in the public domain using one of the online resources shared in class. Listen to several tracks before you decide on one and start producing.
Requirements:
1. Choose a MIDI file with a minimum of five instrument tracks. Classical music is often in the public domain. Popular music and video game music usually isn’t. Decide if you want your production to be bound by copyright restrictions.
2. Use virtual instruments in Ableton Live to select and design instrument sounds for each layer. Virtual instruments can emulate acoustic instruments as well as electronic instruments and sound synthesis.
3. Apply at least three different types of DSP to your project as non-destructive plugins. Processing instrument sounds with effects such as reverb can greatly enhance the believability of the sounds.
4. The length of your piece should be at least two minutes. The overall length is not as important as the quality, so slightly shorter pieces are acceptable as long as all other requirements are met.
5. Mix all the layers effectively so that each instrument can be heard distinctly. Use panning and volume automation to improve the clarity of your mix.
6. Upload the edited and zipped files to Canvas before class starts onWeek 11, Session 2 when we will be presenting your projects for in-class critiques. Please include 1-3 written paragraphs on Canvas explaining your choice of MIDI file and the sound design, and production techniques you employed.
Points Breakdown:
4 points are awarded for the quality and arrangement of the instrumental tracks.
3 points are awarded for your use of automation, processing, and the mix.
2 points are awarded for the creativity, sound design, and impact of the piece.
1 point is awarded for sharing your piece during the in-class presentations.
Session 1: Today I’ll be demonstrating how to import MIDI files into Ableton Live and setup the MIDI tracks to play specific virtual instruments. Ableton Live has a 30 day trial (enough time for our purposes in this class) as well as reduced pricing for students. Using these techniques it is possible to produce your own music starting with a pre-built MIDI file by selecting the instrument sounds you prefer and manipulating the tempo, processing, and textures of the tracks and piece as a whole.
During studio time today please be prepared to demonstrate the items listed in Multitrack Milestone #2.
Session 2: Today we’ll continue demonstrations in Ableton Live. In addition we will be reviewing content that will be on the midterm quiz on session 1 of week 8.
Session 1:The mid-term quiz will be administered today on Canvas. After the quiz we’ll discuss the Audio Technology Oral Essay.
In this class we’ve been focusing on just a few examples (Audition, GarageBand, Ableton Live) of applications associated with audio production, but there are hundreds of excellent and innovative programs for sound design, music production, audio manipulation, or generating new sounds never heard before. Here’s a categorized list of some of the more popular examples.
Description: Produce a two to three minute oral essay on an audio production application or music technology hardware device that we’re not using in this class. Discuss what makes the software or device unique and how you and professionals in the industry might use the software in projects. You may choose from the examples discussed in class, excluding Adobe Audition, Ableton Live, and GarageBand because they have been used or described during class. The intent of this exercise is to explore something new within the vast landscape of audio technology. Choose a software application or device that is distinct, unique, odd, or off the beaten path to make your project interesting to you and your classmates.
Requirements:
1. Record 2-3 minutes of dialog about your software or device
2. Intersperse sound made by the software or device to explain your points
3. Use and cite a minimum of three sources for your example
4. Explain the primary purpose of the software or hardware item
5. Upload your audio to Canvas by Session 1 of Week 13
Points Breakdown:
3 points are awarded for accurately discussing and researching the topic
2 point is awarded for additional sounds and production quality
Session 2: Today we will be presenting your multitrack projects for discussion and feedback. Following your presentation please share a few details about how you produced your piece:
1. What did you learn in the process of combining several tracks of audio?
2. How did you use signal processing to your advantage?
3. How did panning and automation play a part in your mix?
4. What microphones and micing techniques did you find most effective?
Session 1: Today we will discuss the details of the final project that combines the use of multitrack audio and moving images. The final project involves combining visual imagery with sound. One of the key competencies is synchronizing the sound with the visuals or vice versa. For video, you need to replace the sound recorded on location in post-production through the use sound design techniques and ADR. Your piece will be made up of video and multitracked audio synchronized to events in picture.
Description: The Synchronized Audiovisual piece is a one minute thirty second project, combining moving pictures with multi-tracked audio. Synchronizing the sound with the visuals or vice versa will be a critical part of this project. Often sounds need to be replaced in video that is shot on location. Your piece will be made up of video and separate, multi-tracked audio synchronized to events in picture. You may create a derivative work from footage in the public domain. A vast amount of archival and ephemeral footage can be viewed and downloaded from archive.org. Shoot video of your own with either your own equipment or the iPads that are available for checkout.
Requirements:
1. Use Audition to produce your multi-tracked composition with a minimum length of 1:30 minutes.
2. Use field recording or foley techniques to record at least 75% of your sound effects.
3. A one page script is required which includes dialogue and, more importantly, sound design notes.
4. Compile your project in one of the following accepted formats: .mov or .mpeg.
5. A minimum of 10 tracks of audio in Audition is required.
6. Include 2 screenshots of your Audition work in progress with your project (command+shift+3 creates a screenshot on the desktop).
7. Try to maintain the highest possible audio quality. Wave files should be rendered as 48kHz and 24bit (video quality).
8. Use mastering techniques (normalization at a minimum) to finalize your mix.
9. 5% of grade is awarded for presenting your work in class.
10. Upload a bounced .mov file of your project and screenshots to Canvas before the finals period begins.
Points Breakdown:
5 points are awarded for synchronizing your audio well with the visual content
8 points are awarded for the creative content, narrative, style, and tone of the piece
6 points are awarded for your use of automation, processing, mixing, and mastering
1 point is awarded for sharing your piece during the in-class presentations
Session 2: We’ll be covering audio compression today in our group lessons. Audio compression (not to be confused with file compression) is a way to automatically adjust the dynamics of sound. Mixing multiple tracks of audio can often become difficult when some of the audio has varying or inconsistent levels. Audio compression can help resolve these difficulties. It as also widely over-used, especially in the mastering process resulting in the “loudness wars“. Please look at the following articles regarding compression for more information:
Session 1: Mastering is something that ideally is done by a seasoned professional, however, it’s not always possible to afford to pay an experienced mastering engineer. We’ll discuss some of the basics of mastering in class, such as sequencing, sweetening, and loudness. For more information please see the article linked below.
In order to complete your final projects you will be required to mix down and render your audio to a two track master. This master will most likely be a .wav or .aiff file which can be transferred to either CD or DVD. This process used to be completely manual, but today we have the aid of computer automation allowing us to produce much more precise mixes in a fraction of the time.
Final Project Milestone #1 Due: Session 1, Week 11
Demonstrate that you are making progress on the final project. The following is a list of what I am expecting you to illustrate to me during the scheduled milestone.
1. Show an example of the visuals that you are using for your final project.
2. Open and play an Audition document that includes at least one track of audio.
3. Make sure that you have a master fader applied to your document.
Session 2: How do you import movies into Audition? How do you then display the movie? How do you get the audio from the QuickTime movie onto a track in Audition? This is very important when producing audio for video that need to be synchronized to picture. These are some of the things we’ll be covering over today.
Final Project Milestone #2 Due: Session 2, Week 12
Illustrate your progress on the final project. The following is a list of what I am expecting you to show me for the scheduled milestone.
1. Show an example of the visuals and sound combined for your final project.
2. Open and play an Audition document that includes several tracks of audio for the final.
3. Show one example of automation in your document.
4. Demonstrate the use of non-destructive effects in your Audition document.
Session 1: Home recording technology has advanced rapidly over the last few years, making it possible to produce music in your bedroom that’s as high quality (fidelity wise) as any professionally produced music or audio at a fraction of the cost. We’ll be discussing some of the principals of home recording which allow you to cost effectively produce high fidelity audio without having to spend big bucks in a recording studio.
We will also talk about some of the hardware available for home studios. Professional quality audio is currently produced in inexpensive home studios around the world. Professional quality sound cards are available for as little as $129 (see http://www.m-audio.com/). With an inexpensive mixer and some reference monitors you can be on the way to building a “bedroom studio” of your own.
After the discussion we will look at a series of videos that illustrate some of the sound design techniques used for the Peter Jackson remake of King Kong.
Session 2: Today we will present your MIDI File Production projects. Make sure you are prepared by having your project turned in on Canvas. Also, be ready to explain your mixing techniques and describe what sort of processing you used to fine tune your piece.
Session 1: This week and next I’ll be demoing several techniques that apply to your final projects. Today let’s discuss a few tips and techniques for audio production. Some of these you’ve heard before, but bear repetition. Studio time will also be available.
Tips to remember when producing audio:
1. Garbage in = garbage out. If your recording doesn’t sound good, try again. Try not to waste time fixing something that should be re-recorded. 2. Use EQ in to mould your mixes. Each track should have its own frequency spectrum, especially in the low end. Filter the lows out of tracks that don’t need to occupy that space. 3. Trust your ears. In the end it is up to you to decide how to mix your piece. Listen carefully and keep changing things until it sounds right. 4. Use fades frequently. Sound rarely stop abruptly. Fade in and out tracks for more natural sounding mixes. 5. Don’t over process (or under process). Too much reverb or delay will diminish the clarity of your mixes. Use processing sparingly to enhance the realism of your piece. 6. Listen, listen, listen. Listen to your mixes loud and soft in different places and on different speakers and headphones. If you rely on headphones your mixes will lack detail and be too bassy. Don’t. 7. Timing is everything. Without time sound does not exist. Poor timing is obvious to everyone. If you hear or see bad timing put in the effort to fix it. 8. Mixing is mostly volume. Instead of turning one thing up, turn everything else down. If you keep turning up things you will eventually cause clipping. 9. Don’t forget the panning. Panning places sound physically in space and will help match the sound to picture. Be careful not to over-pan your mix out of balance. 10. Backup your work. This should really be number one. Don’t forget that you have a terabyte of cloud storage with OneDrive.
Session 2: Today is an optional open lab for feedback and questions regarding you final projects. You will not be marked absent if you decide not to attend.
Session 1: Today in class I will be discussing the basics of MIDI sequencing. We learned some of what’s possible during the MIDI File Music Production project, but sequencing music is an incredibly deep and involved art form. We will discuss and demonstrate techniques including, step editing, arpeggiation, automation, quantization, and transposition.
After the demo we’ll have a brief discussion regarding the steps necessary to “master” your final audio and combine it with the video.
Final Project Milestone #3
Due: Session 2, Week 14
Illustrate your progress on the final project for the last class meeting before our finals period. The following is a list of what I am expecting you to show me for the scheduled milestone.
1. Show an example of the visuals and sound combined for your final project.
2. Show multiple examples of automation in your document.
3. Demonstrate the use of non-destructive effects in your Audition document.
4. Discuss your plan for finalizing and mastering your project.
Session 2: Studio time will be available today to get feedback on your projects. Please be prepared with the Final Project Milestone #2 requirements outlined on Week 10.
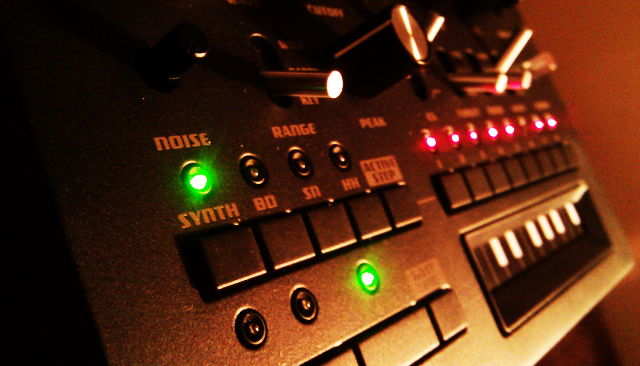
Session 1: Most of the time this week will be available as studio time for milestones, feedback, and one-on-one questions. However, today I would like to give you a quick demonstration about the basics of sound synthesis. We will discuss the basic types of sound synthesis and how producers use these techniques. I will also demonstrate examples of subtractive synthesis using both analog and digital methods.
Session 2: Today is the final day of studio time available for you to get feedback and have questions answered before the final presentations. We will also meet in small groups to get peer feedback on your Final Project works in progress. Also, please take a few minute to complete the IDEA survey for this class at https://stthomas.edu/idea.
Supplemental materials for courses taught by John C.S. Keston at the University of St Thomas