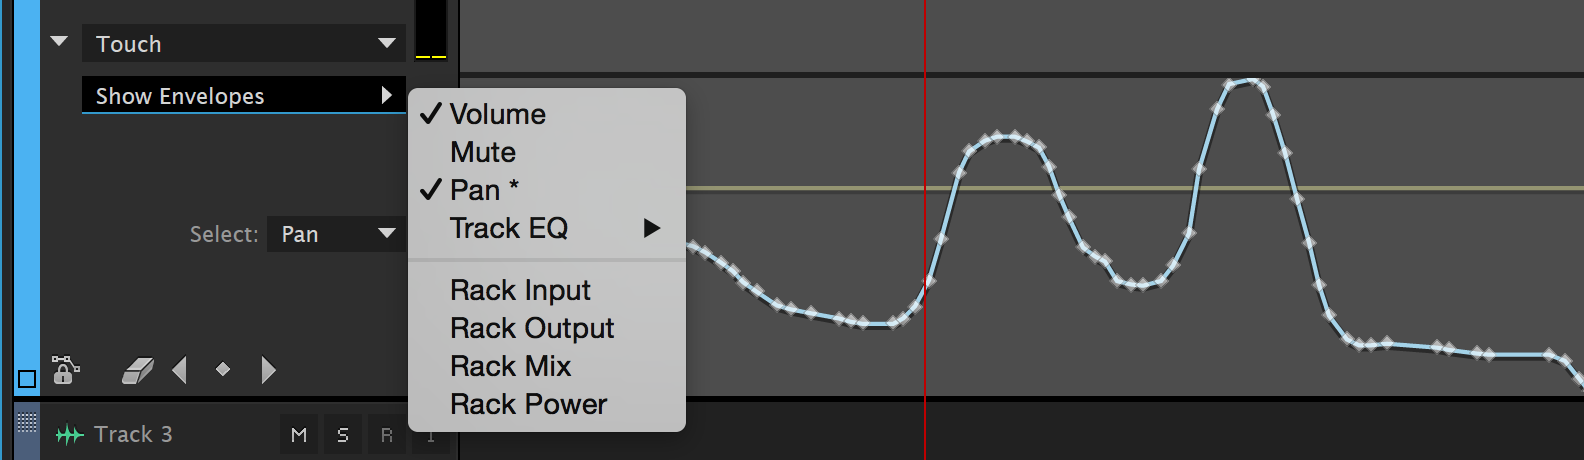
Session 1: Let’s discuss and experiment with bus sends and automation lanes. In Audition automation lanes are referred to as envelopes. Using envelopes we can adjust virtually any parameter you can imagine over time. These adjustments can be made with key frames and lines to ramp from one value to another. Alternatively you can capture the movement of controls into the envelopes and reproduce the performance during playback. In today’s demo I will explain how to use envelopes and why they are important for multitrack mixing.
During studio time today please be prepared to discuss your Multitrack Project concept as described in the Multitrack Project Milestone #1 last week. Also, today will be the last opportunity for questions and feedback on your Field Recording Library Project which is due next class.
Multitrack Project Milestone #2:
Due: Session 1, Week 7
1. Show that you have a minimum of three tracks in your Audition session
2. Demonstrate the use of EQ on one or more tracks
3. Demonstrate the use of effects sends on one or more tracks
4. Enable at least one example of automation in your work in progress (panning, volume, or effects level)
Session2: Today we will be listening to examples that you choose to present from your Field Recording Library. Explain what drew you to the sounds you recorded. What techniques and equipment did you use to record them?

Next we will discuss the MIDI File Music Production project. This project will give you the opportunity to produce royalty free music that you might use in final project or future productions without the worry of licensing fees or copyright infringement. Adobe Audition CC does not support MIDI. Fortunately there are plenty of alternatives that do. Next week we will investigate a couple of applications and techniques for reading MIDI files and producing unique tracks based on the data contained within them. For now let’s talk a little bit about MIDI and discuss the requirements for the project.
MIDI (Musical Instrument Digital Interface) is a data protocol for music. It has existed, virtually unchanged, since the early ’80s when it was developed to allow electronic synthesizers from different manufacturers to control and be controlled by each other. MIDI has far exceeded its expectations at conception. Soon after its development software was developed to use the MIDI protocol to sequence music on computers. This led to a General MIDI Standard in 1991 so that files containing MIDI data could sound similar from one device to another. A few years later the Internet was flooded with MIDI files. The small size of MIDI files made it possible to download and play them on mobile devices as ring tones. These days, most ring tones are sample-based digital audio, but the Internet still holds a vast repository of MIDI files from a broad array of musical styles.
Project 3: MIDI File Music Production Project
Due: Session 2, Week 11 (10 points)
Description:
The MIDI File Music Production Project is an opportunity to produce royalty free music based on pre-existing MIDI files. It is also a chance to experiment with sound design techniques that are available through the use of virtual instruments. You do not have to be a musician to do this! Use Ableton Live (a 30 day trial version is available here) to import a MIDI file of your choice and produce the instrument sounds and processing for each layer. Find a MIDI file in the public domain using one of the online resources shared in class. Listen to several tracks before you decide on one and start producing.
Requirements:
1. Choose a MIDI file with a minimum of five instrument tracks. Classical music is often in the public domain. Popular music and video game music usually isn’t. Decide if you want your production to be bound by copyright restrictions.
2. Use virtual instruments in Ableton Live to select and design instrument sounds for each layer. Virtual instruments can emulate acoustic instruments as well as electronic instruments and sound synthesis.
3. Apply at least three different types of DSP to your project as non-destructive plugins. Processing instrument sounds with effects such as reverb can greatly enhance the believability of the sounds.
4. The length of your piece should be at least two minutes. The overall length is not as important as the quality, so slightly shorter pieces are acceptable as long as all other requirements are met.
5. Mix all the layers effectively so that each instrument can be heard distinctly. Use panning and volume automation to improve the clarity of your mix.
6. Upload the edited and zipped files to Canvas before class starts on Week 11, Session 2 when we will be presenting your projects for in-class critiques. Please include 1-3 written paragraphs on Canvas explaining your choice of MIDI file and the sound design, and production techniques you employed.
Points Breakdown:
4 points are awarded for the quality and arrangement of the instrumental tracks.
3 points are awarded for your use of automation, processing, and the mix.
2 points are awarded for the creativity, sound design, and impact of the piece.
1 point is awarded for sharing your piece during the in-class presentations.
Reading:
Wikipedia MIDI Resources