Session 1: Let’s start today with critiques of artist statements that we didn’t get to last week. Afterward I will be demonstrating the abbreviated technique for installing WordPress provided as a service within the Bluehost web hosting control panel.
Session 2: Today we will be discussing detail and assigning tasks for the Sustainable Communitiy Partnerships (SCP) program.
Session 3: Revised artist statements are due today on the Sandbox. We may also reviewing inspirational portfolios.
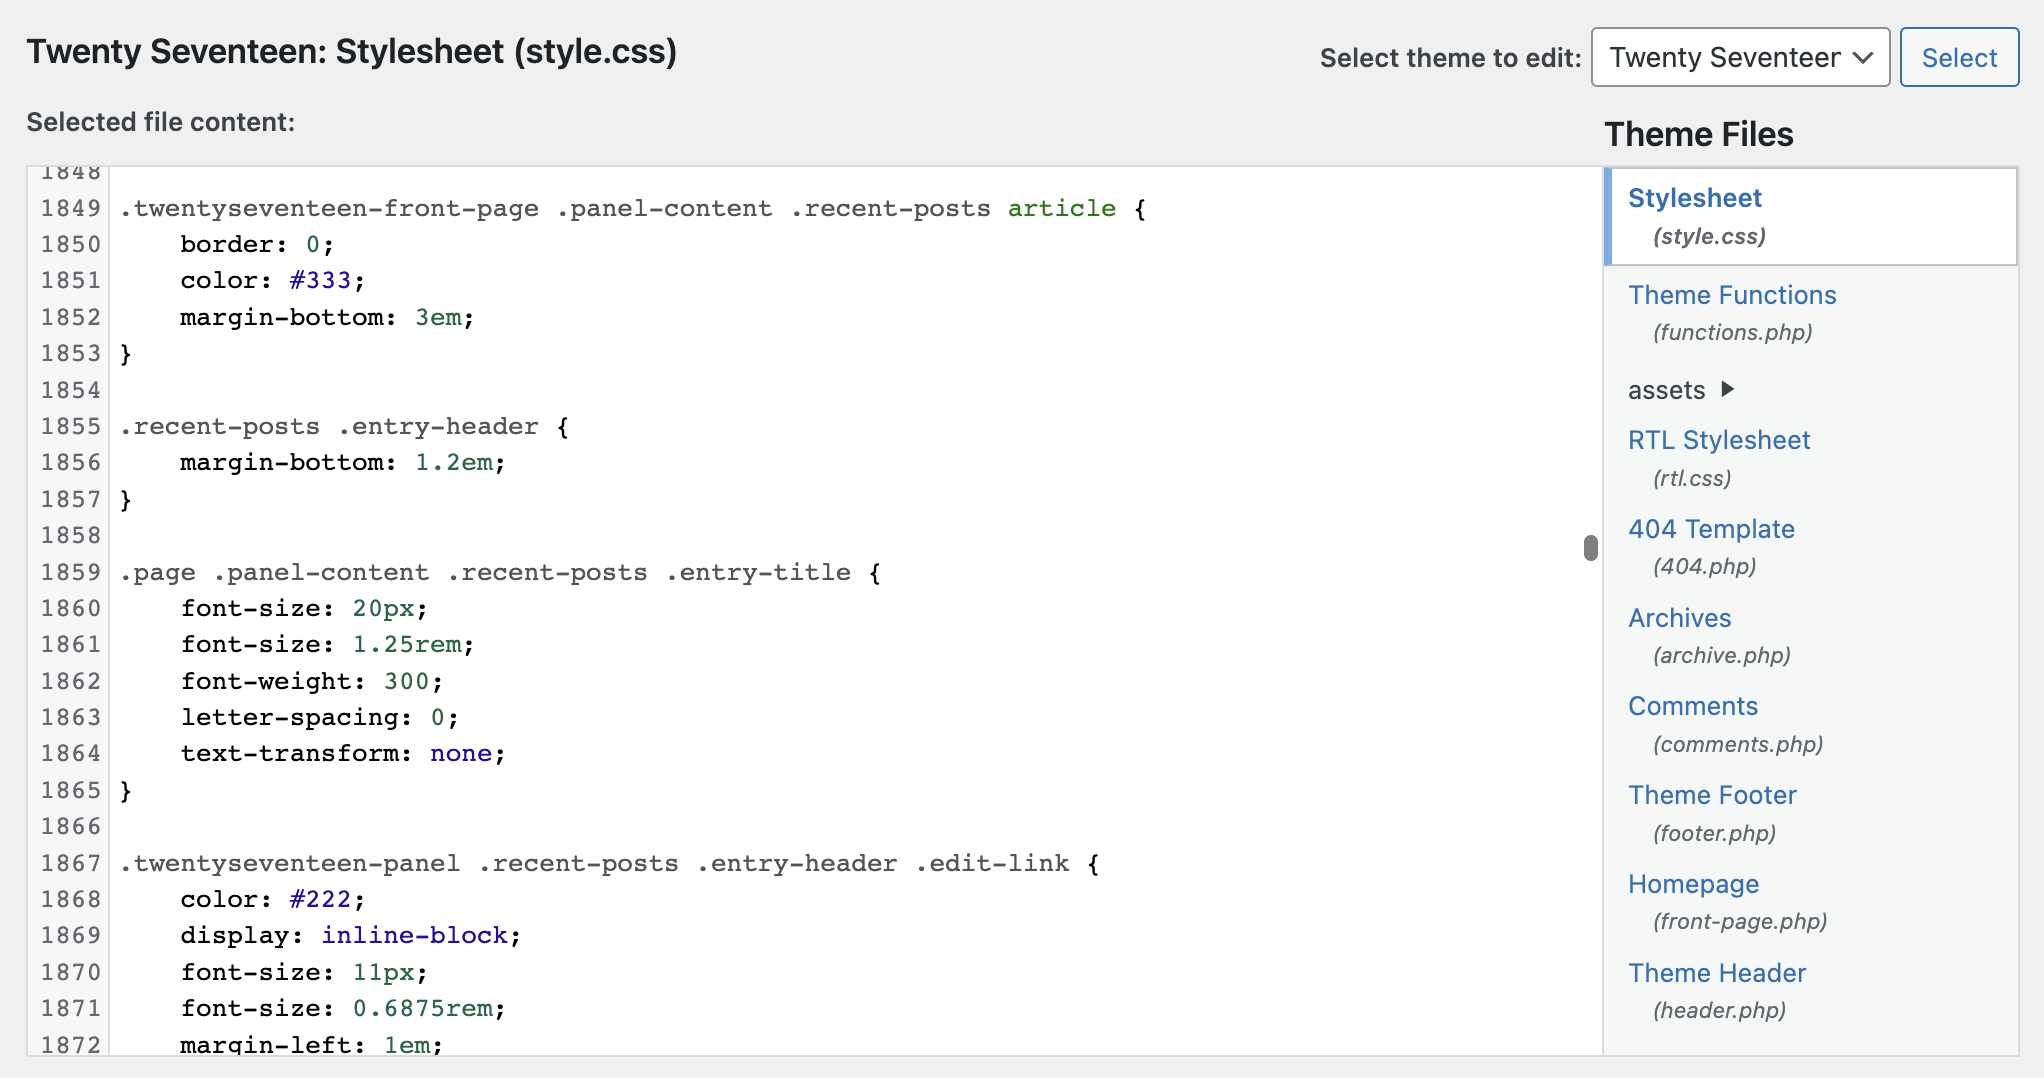
Session 1: Today we will begin having a look at the style.css file included with each WordPress theme. This is the file that contains most of the CSS rules and properties that define the look and feel of your theme. Often the best way to find what you need to change is by using the inspector in your browser.
Session 2:WordPress child themes are an excellent way to add personalization to your themes. Editing themes directly should be avoided because scheduled updates to the theme will delete your changes, whereas a child theme will retain changes even when the parent theme is updated. The demo today will include the steps necessary to setup a child theme and a few theme changes that can be implemented using this technique.
Description: Submit links for up to three professional portfolios you admire. Be prepared to discuss what you find compelling about the portfolio(s) you submitted. Is the UI/UX up to your standards? How do the portfolio(s) and/or the work contained utilize the gestalt theory of perception? Does form follow function? Is the design the most advanced yet acceptable?
Session 3: We will start today by looking at your examples of professional portfolios selected for Inspiration Exercise #2. Afterward I will answer questions about child themes
Session 1: Today let’s finish looking at your professional portfolio examples.
Session 2: This class period will be used entirely for sharing your portfolio works in progress in critique #3. If we don’t have time to look at everyone’s work, then we can pick up from where we left off next week.
Critique #3: Your Portfolio WIP (The Scaffolding)
Points: 1 (toward participation total)
Due: Week 8, Session 2
Description:
Be prepared to show and discuss your portfolio work-in-progress. Your work does no need to be complete or advanced at this stage. This is an opportunity to get feedback from your peers, ask questions, and suggest demos. It is preferred if your work is hosted on your own domain and web hosting, but it is also acceptable to show your work on a sandbox if one was setup for you.
Session 3: Today we will look at your works-in-progress including your portfolio and the significant project you plan to include in your portfolio. Through this process we will determine areas that need further exploration within WordPress, graphic design, and web technology. If time permits we can look at the professional portfolios examples that weren’t shared last week.
Session 1: Let’s use today to finish up the critiques started on session 2 of week 8.
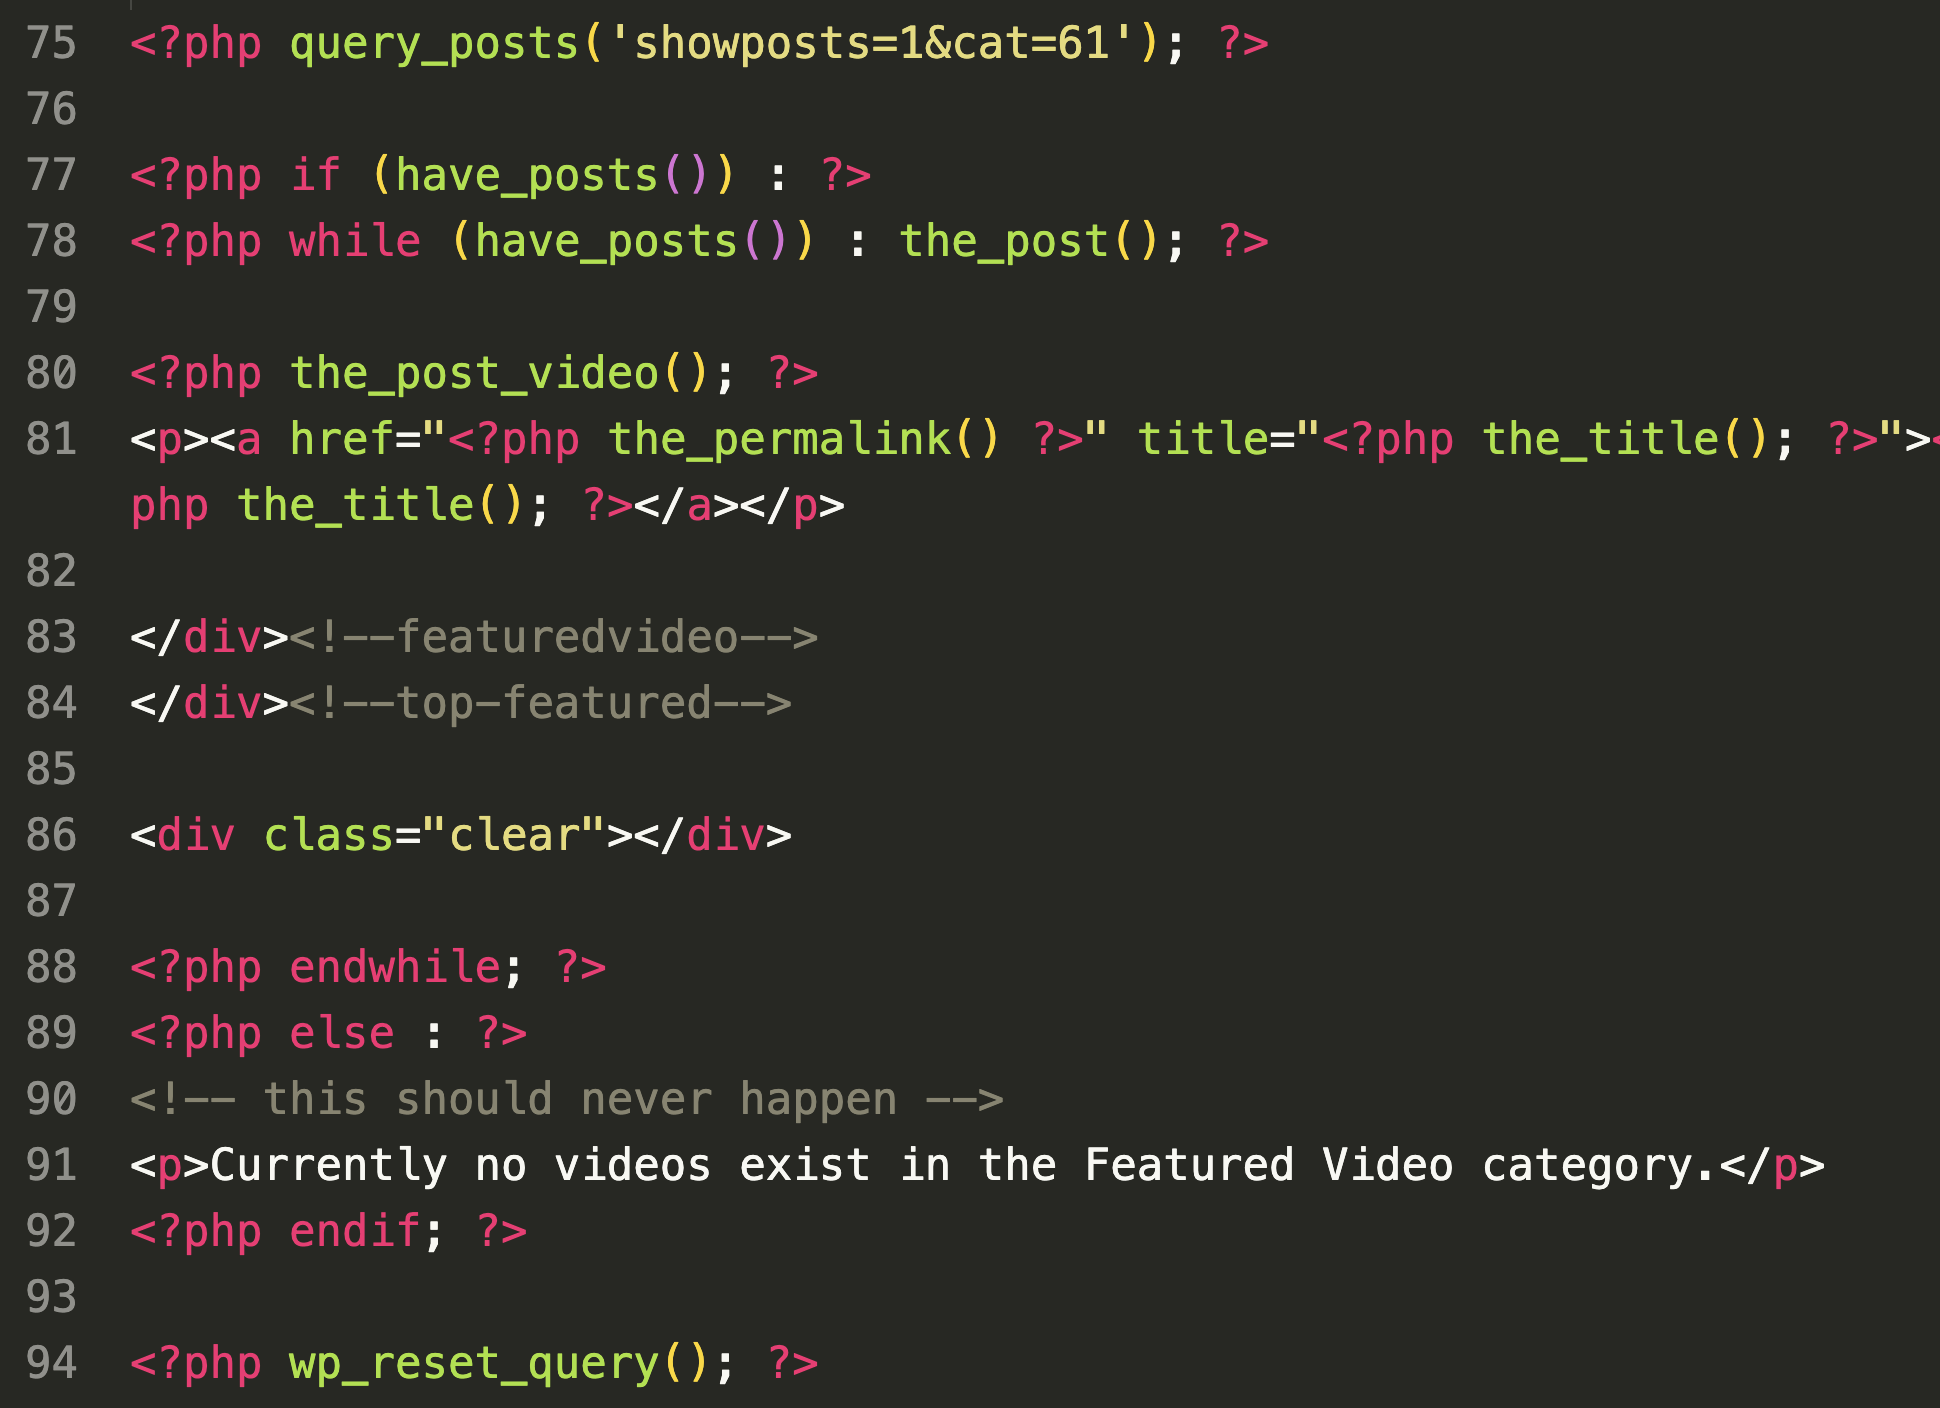
Session 2: For the rest of this week we will look at additional techniques that you may apply to customization of your WordPress installations. Specifically we will look at adding templates to you child themes. WordPress templates are PHP files that interact with the WordPress database and core functionality.
A WordPress template contains the HTML, CSS, and PHP code that determines the layout and design of your website. Templates that are added to your child theme will override the template file in you parent theme. Typically you will copy the parent template to your child theme and make your changes there. This will maintain the integrity of the parent theme and allow for updates without loosing your work.
The types of WordPress templates include:
The main index template: This template displays your site’s homepage (index.php). Page templates: These templates are used to display individual pages on your website (about, contact, etc.) Post templates: These templates are used to display posts. Archive templates: Used to display lists of posts, such as your blog’s archive page or your category pages. Search templates: Displays the results of search queries.
Session 3: Today is studio time to resolve problems and answer questions regarding your portfolio projects.
Session 2: Last week we looked at WordPress templates and how we might modify them in a child theme. Template tags are one of the fundamental ways of doing this. Although using them is a little bit trickier than modifying style.css doing so can make essential changes to your child theme possible. Let’s apply a few examples in class today.
Session 1: Let us discuss the first annual Media Design Portfolio Show! Here are a few points to remember when participating:
1. Your portfolio should be available online and work consistently over a variety of device dimensions (desktop through mobile).
2. Prepare take aways for visitors including a business card, resume, and optionally mints or candy.
3. Dress appropriately. No shorts or flip flops. Consider a button up shirt. Suits are optional.
4. Be open, available, smile, and invite visitors to browse your work.
Session 2: Workshop / demos. Today in class please be prepared with a question(s) regarding your portfolio. This is an opportunity solve an issue you might have with a child theme, style.css, template tags, or plugins.
Session 3: Portfolio work-in-progress critiques. As we get closer to the end of the semester and the portfolio show, feedback on your work becomes more targeted and necessary.
Session 1: We’ll start today with a few updates regarding the 2023 Media Design Portfolio Show. Afterwards we will continue our WordPress workshops.
Session 2: We’ve been focusing on critiques centered on your portfolios. Today please be prepared to participate in critiques on your significant portfolio pieces.
CISC/DIMA 259 Creative Coding Practices and Techniques
This course examines the application of new and emerging technologies in creative and interactive media production and development. Modern audiovisual, music, and interactive projects benefit from the use of creative coding, visual programming environments, microcontrollers, sensors, data visualization, data sonification, automated fabrication, and open source platforms. As technology advances, these tools have become more common, less expensive, and easier to use. Students will put several of these new technologies into practice through a number of assignments including a final project performed or exhibited at the end of the class. A keen sense of curiosity is suggested, but no previous electronics or coding background is required.
Meeting Times and Location Spring Semester 2025:
Lecture: Tuesday/Thursday, 15:25 – 17:00
Lab: Wednesday, 13:30 – 15:10
Location: John R. Roach Center JRC 426
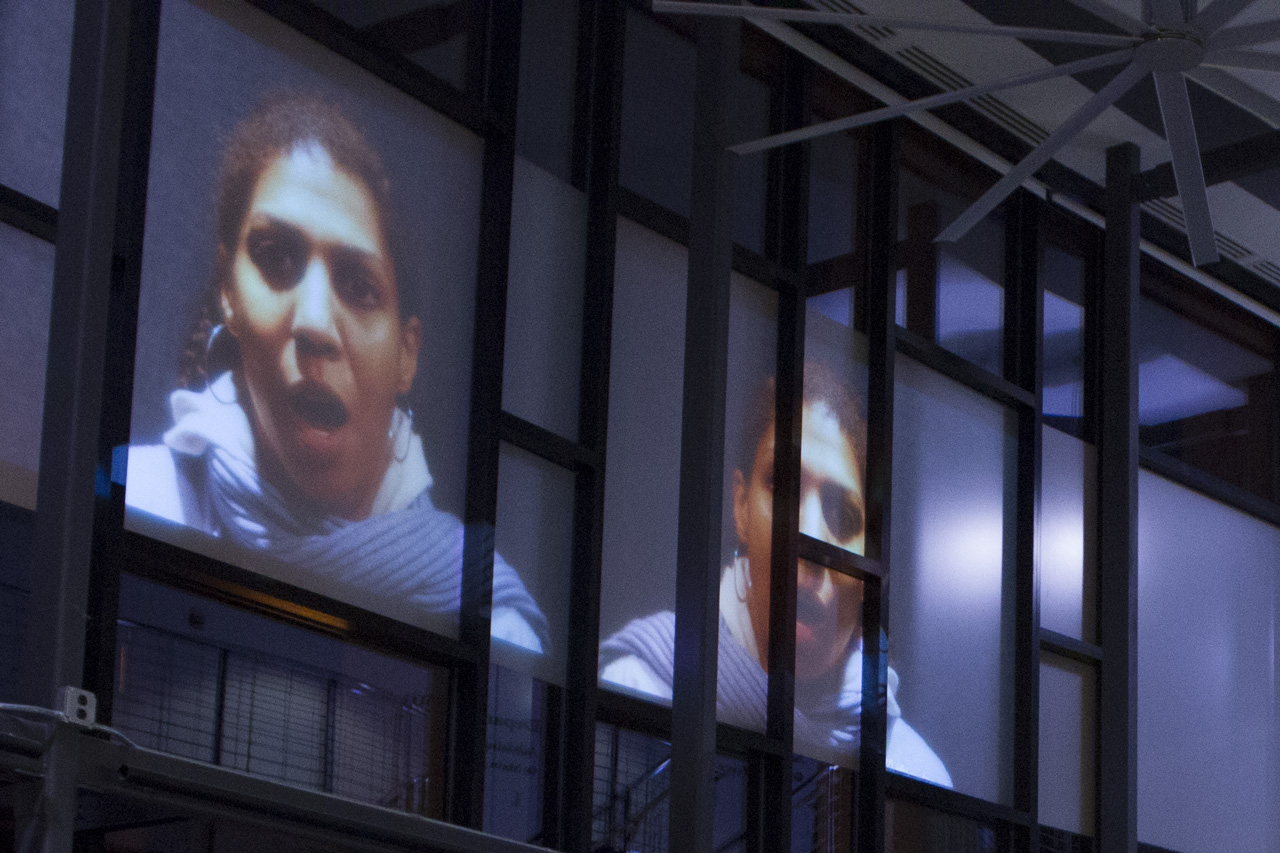
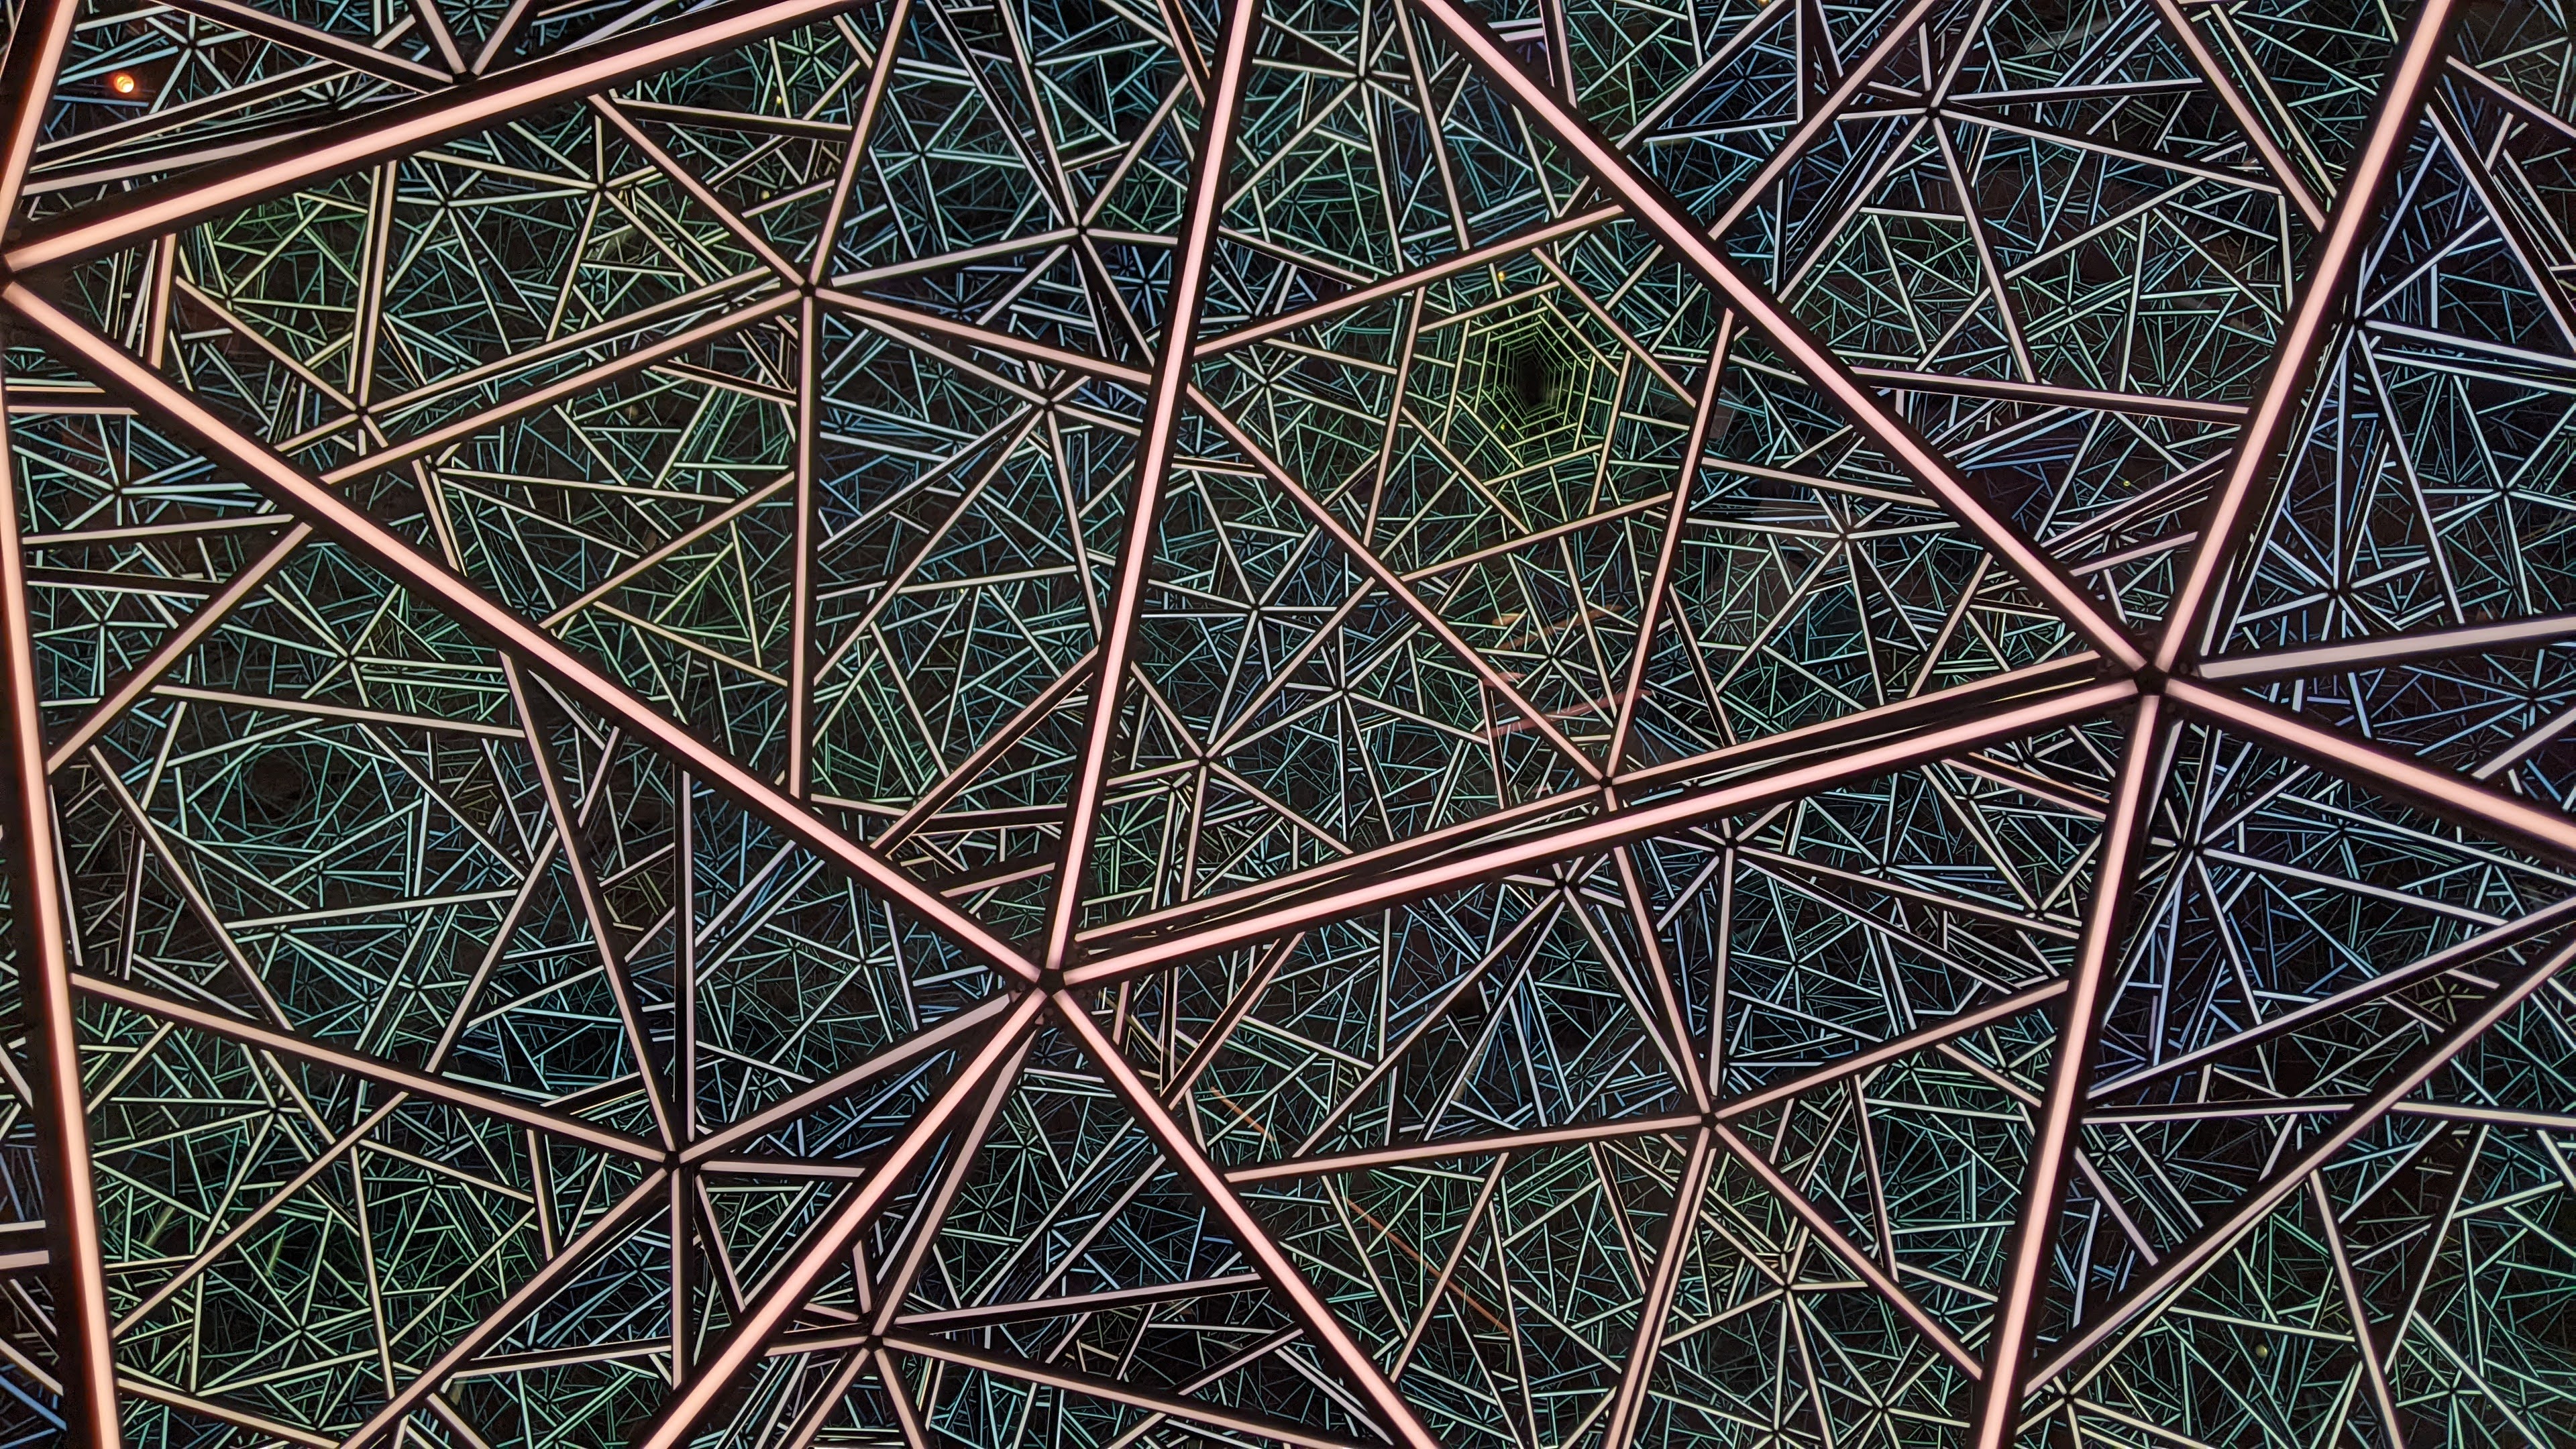
‘Axioma’ – 3D projection mapping at LLUM BCN Festival 2016 in Barcelona by Onionlab
Session 1: This class is an introduction to creative coding and how these techniques are used by artists and developers to produce projects that engage audiences in magical experiences. These might be installations, projections, data visualizations, sound art, games, or entertainment.
Creative coding is a type of computer programming in which the goal is to create something expressive instead of something functional. It is used to create live visuals and for VJing, as well as creating visual art and design, entertainment, art installations, projections and projection mapping, sound art, advertising, product prototypes, and much more. – Wikipedia
Creative Coding has its roots in the demoscene which began in the 1980s and continues to this day. The Demoscene has often been described as “digital graffiti” and differres from video game demos because the demos were originally created by hackers and crackers who made them as intros to hacked versions of video games with the copy protection removed. In our first lab we’ll discuss the documentary embedded below about the Demoscene to help put the history of Creative Coding into context. Note: an archive of demos associated with demoscene collectives can be found on pouet.net.
Please prepare for the discussion by answering the following questions:
1. What three things about the Demoscene surprised you in the film?
2. After seeing the film what do you find exciting about Creating Coding?
3. Identify two techniques you saw in the film that you’d like to know more about.
The 80s and 90s Demoscene: The Art Of The Algorithms
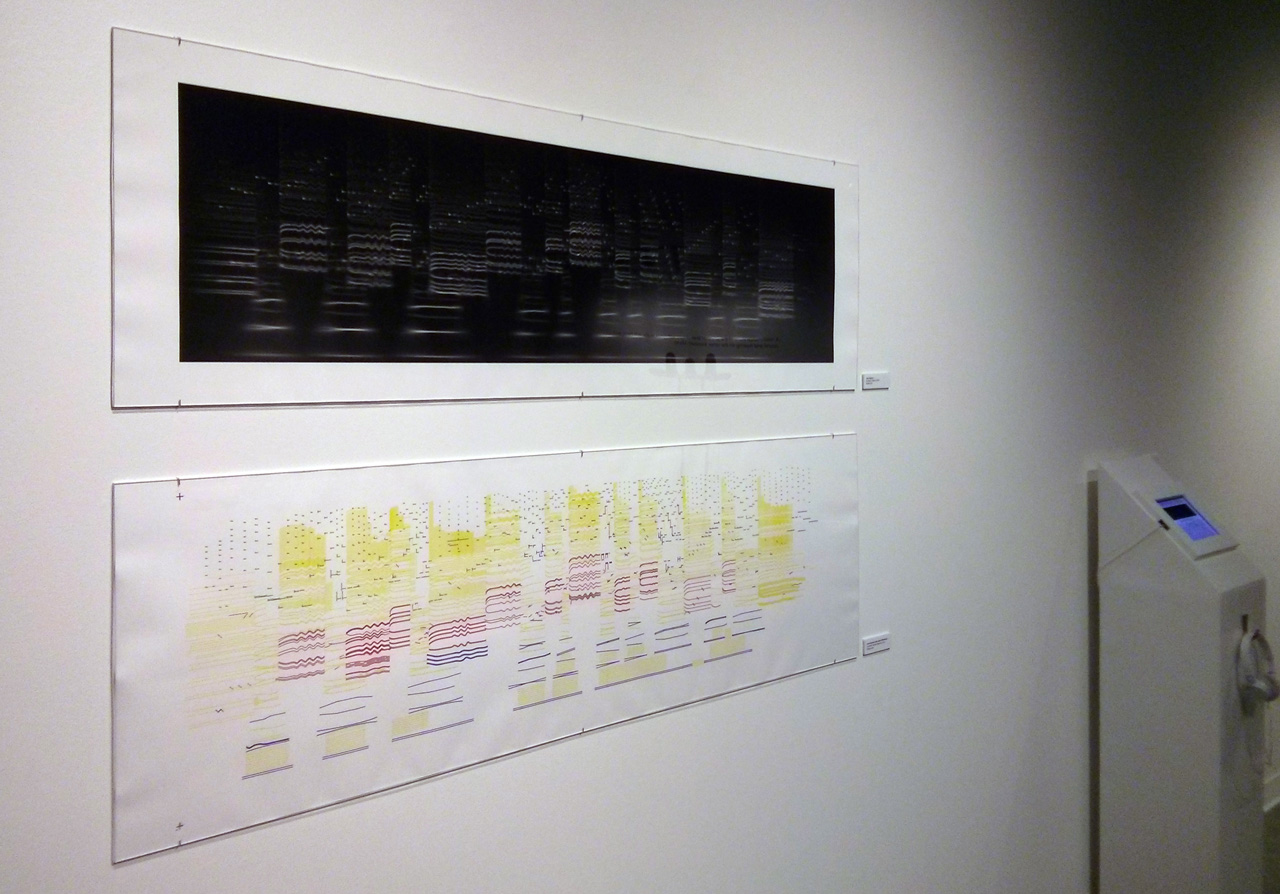
Session 2: Creative coders believe that computer programming can be used as a medium, like clay is to sculpture, or pigments are to canvases. Let’s look at a few examples of creative coders who focus on using code to create visual work. Chrome Experiments focuses on projects that demonstrate the capabilities of the Chrome browser. These projects are coded in JavaScript and often make use of Open Source libraries. The code is generally available to browse so we can learn from it or fork the code to make a similar or entirely different project.
Dutch artist Rafaël Rozendaal, who founded BYOB (bring your own beamer), takes the idea of creating “…something expressive instead of something functional” to an extreme. Essentially he uses the web as a canvas for “paintings” that employ interaction, motion, and sound elements. Here are a few examples of his website art:
NOTE: Why JavaScript? 1) JavaScript is easy to learn yet it can still be used for advanced software development. 2) JavaScript can run almost anywhere including mobile devices, tablets, laptops, desktops, and web servers. 3) JavaScript is an open standard based on ECMAScript that’s been around for 25 years with a vast community and available resources. 4) JavaScript has been extended through many libraries and frameworks that make it easier to perform tasks like web audio, animation, front-end development, user interface design, and much more.
Lab: Today we will cover the basics of JavaScript. Using the resources above from the Mozilla Developer Network we will work our way through a basic understanding of the JavaScript language and demonstrate the techniques required for Problem Set 1: (Simple Calculator).
Problem Set 1: (Simple Calculator)
Due: Week 2, Lab 1 (3 points)
Create a simple calculator using JavaScript and HTML forms. The calculator will be capable of addition, subtraction, multiplication, division, and three more operations of your choice (square root, exponents, random number generator, sine, cosine, tangent, logarithms, etc.). Earn one point for a working calculator and two points for expanding the functions. Note: do not use the eval() function!
1. All problems sets are due by the beginning of the lab following when they were assigned.
2. Submit answers on Canvas uploaded as HTML, JavaScript, CSS, .zip or otherwise as noted.
3. Solutions to each problem set will be given during demos on the day that they are due.
Session 1: Our first project will be to create motion in the form of a bouncing ball. We will start by creating a bouncing ball using JavaScript and then we will do it again using a JavaScript library called P5.js. Before we do any of this let’s have a quick lesson in the JavaScript language and learn how to tween or animate objects using HTML5, the <canvas> tag, and JavaScript. Let’s start by going through the Canvas tutorial on the Mozilla Developer Network (MDN).
Problem Set 2: Getting Started with Canvas
Due: Week 2, Lab 2 (3 points)
Use the HTML5 canvas tag and JavaScript to place objects and images in the brower’s client area. Follow instruction in the MDN: Basic Use of Canvas documentation to draw shapes & images, apply colors, and draw text. Try different canvas dimensions x/y locations for the objects. Optional: use the setInterval() function to animate an object on the canvas.
1. All problems sets are due by the beginning of the lab following when they were assigned.
2. Submit answers on Canvas uploaded as HTML, JavaScript, CSS, .zip or otherwise as noted.
3. Solutions to each problem set will be given during demos on the day that they are due.
Session 2: Today I will show solutions to Problem Set 1 (due today). Afterward let’s take a look at rendering objects to an HTML5 canvas and start on learning how to animate objects on a canvas using the setInterval() function function in JavaScript. Let’s start by discussing the requirements for our first project. Note: Projects have more points and therefore more weight toward your final grade than problem sets.
Project 1: HTML5 and JS Animated Circle
Due: Week 4, Session 2 (Beginning of Class)
Points: 5
Part 1: using the setInterval() function, animate a circle on a minimum 500 by 500 pixel canvas within an HTML5 document. Use the example code below as a starting point. Start by making the circle bounce back from the edges of the canvas. Next clear the canvas repeatedly so that the circle appears to be animated. Try enhancing the animation by cycling the colors of the circle, either randomly, or through a range. Adjust the bounce point so that part of the circle is not hidden.
Part 1: once you have something you like, create a similar but more advanced version using the P5.js library. Using setInterval() will not be necessary for the P5.js version. We are doing the same project twice because the first time illustrates how to do it in raw JavaScript, while the second time will much easier with the aid of P5.js. Important: In the P5.js version make use of arrays to have a variable amount of circles animated (as demonstrated) and apply some of your own creative ideas NOT demonstrated in class to the P5.js version.
Requirements Part 1:
1. Use HTML5 and JavaScript to animate a circle in a minimum 500 by 500 pixel canvas
2. Clear the canvas so that the circle appears to animate
3. Cycle the colors and / or the size of the circle to enhance the animation
4. Adjust the bounce point so that part of the circle is not hidden
Requirements Part 2:
1. Rewrite the project using the P5.js library
2. Apply three more of your own creative ideas to make your project unique
3. In the P5.js version Use arrays to animate many circles at once
4. Turn in both versions as .html and .js documents on Canvas*
*Follow the instructions posted on week 1 to turn in your work correctly and remember to include all required assets and libraries
Lab: Use the lab today to experiment with P5.js and start on converting your HTML5 and JS Animated Circle to using the p5.js framework instead of using raw JavaScript.
Afterward get started on coding the HTML5 and JS Animated Circle. You can use the JavaScript below as a starting point. I will be available to answer questions and help you troubleshoot your code.
var ctx;
var dx = 5; var dy = 4;
var y = 250; var x = 250;
function draw(){
	ctx = myCanvas.getContext('2d');
	ctx.beginPath();
	ctx.fillStyle = "#00bb00";
	ctx.arc(x,y,40,0,Math.PI*2,true);
	ctx.closePath();
	ctx.fill();
	if( x < 0 || x > 500) {
		dx = -dx;
	}
	if( y < 0 || y > 500 ) {
		dy = -dy;
	}
	x += dx;
	y += dy;
}
// call a function repeatedly at a set interval
setInterval(draw,30);
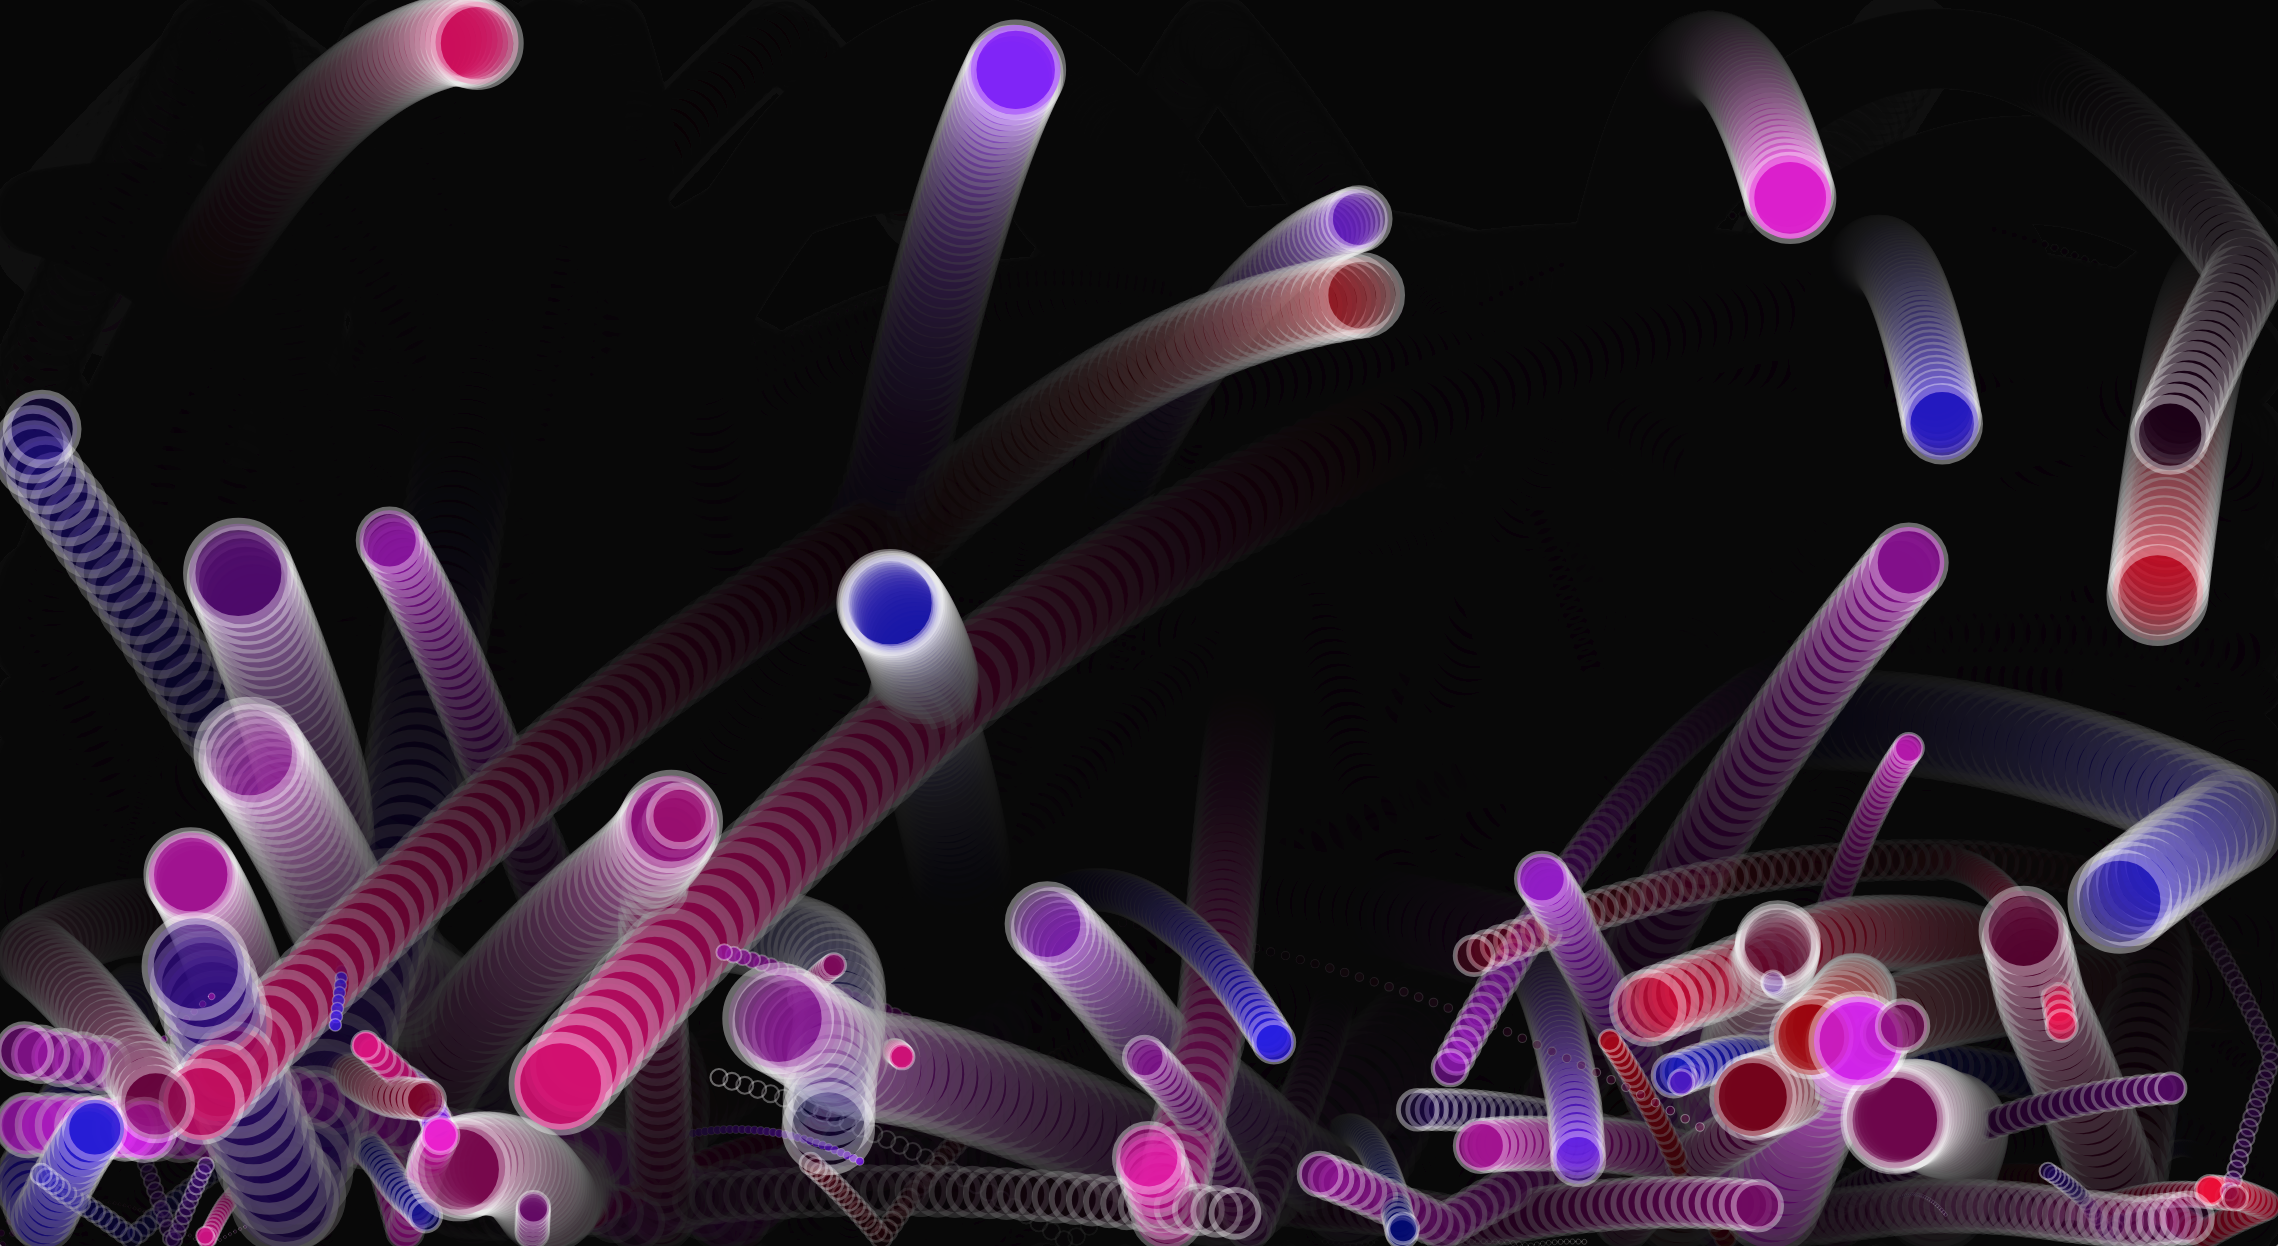
Session 1: As we have seen, creating animation with pure JavaScript is promising, but can also be time consuming and cumbersome. To make this process more efficient we will unlock the animation potential of the HTML5 Canvas tag by using JS frameworks like P5js.org. Much less code is necessary when you have pre-written methods to support common motion graphic techniques, like tweens, fades, color manipulation, and transitions. This week we will explore P5js.org and learn some ways to make our projects interactive.
P5.js is based on Processing.org developed at MIT by Ben Fry and Casey Reas. The Processing language was developed to attract artists and designers to programming. It is easy to learn, yet powerful enough to create complex software like the Gesteral Music Sequencer or GMS. Here’s a list of some notable creative coding artist that use Processing or similar languages:
Lab 1: In today’s lab we will continue to look at the basics of P5js.org and start on porting the HTML5 and JS Animated Circle.
Session 2: Animating one or two shapes on a screen is one thing, but what if we wish to animate dozens or even hundreds of shapes at once? There are many ways we can do this, but let’s start by using arrays. Arrays are variables in list form. Imagine a can of soup as a simple variable, and an array as a carton of eggs. Let’s use arrays to animate more than just a few objects at once.
Lab 2: Let’s continue exploring the possibilities of arrays and how we might implement them into our HTML5 and JS Animated Circle exercises.
Session 1: Thus far we have dived into the deep end of creative coding with knowledge of few strokes to keep us afloat. Fortunately it is not possible to literally drown from learning code. We have excellent resources that expand our understanding of these languages. Let’s take a look at Object Oriented Programming with JavaScript this week. Please review Working with Objects from MDN for a more detailed explanation of how JavaScript handles OOP. We will use the ES6 object syntax:
Problem Set 3: Objects and Vectors
Due: Week 5, Lab 1 (3 points)
Use the HTML5 canvas tag and JavaScript, and P5.js to declare an object that has methods to display and move a shape. Use the mouse point position to influence the movement of the shape. Give your objects a minimum of four properties including a vector for the x/y location.
1. Problems sets are due by the next lab or the specified due date.
2. Submit answers on Canvas uploaded as HTML, JavaScript, CSS, .zip or otherwise as noted.
3. Solutions to each problem set will be given during demos on the day that they are due.
Session 2: Let’s start today by presenting your HTML5 and JS Animated Circle projects. We have looked at a simple implementation of object oriented programming, then slowly added complexity to follow the mouse position. Let’s explore more ways that we can interact to manipulate visuals using P5 such as interaction, detecting collisions, or adding/removing objects from the object pool. Here are some prompts that suggest ways to involve interaction in our projects:
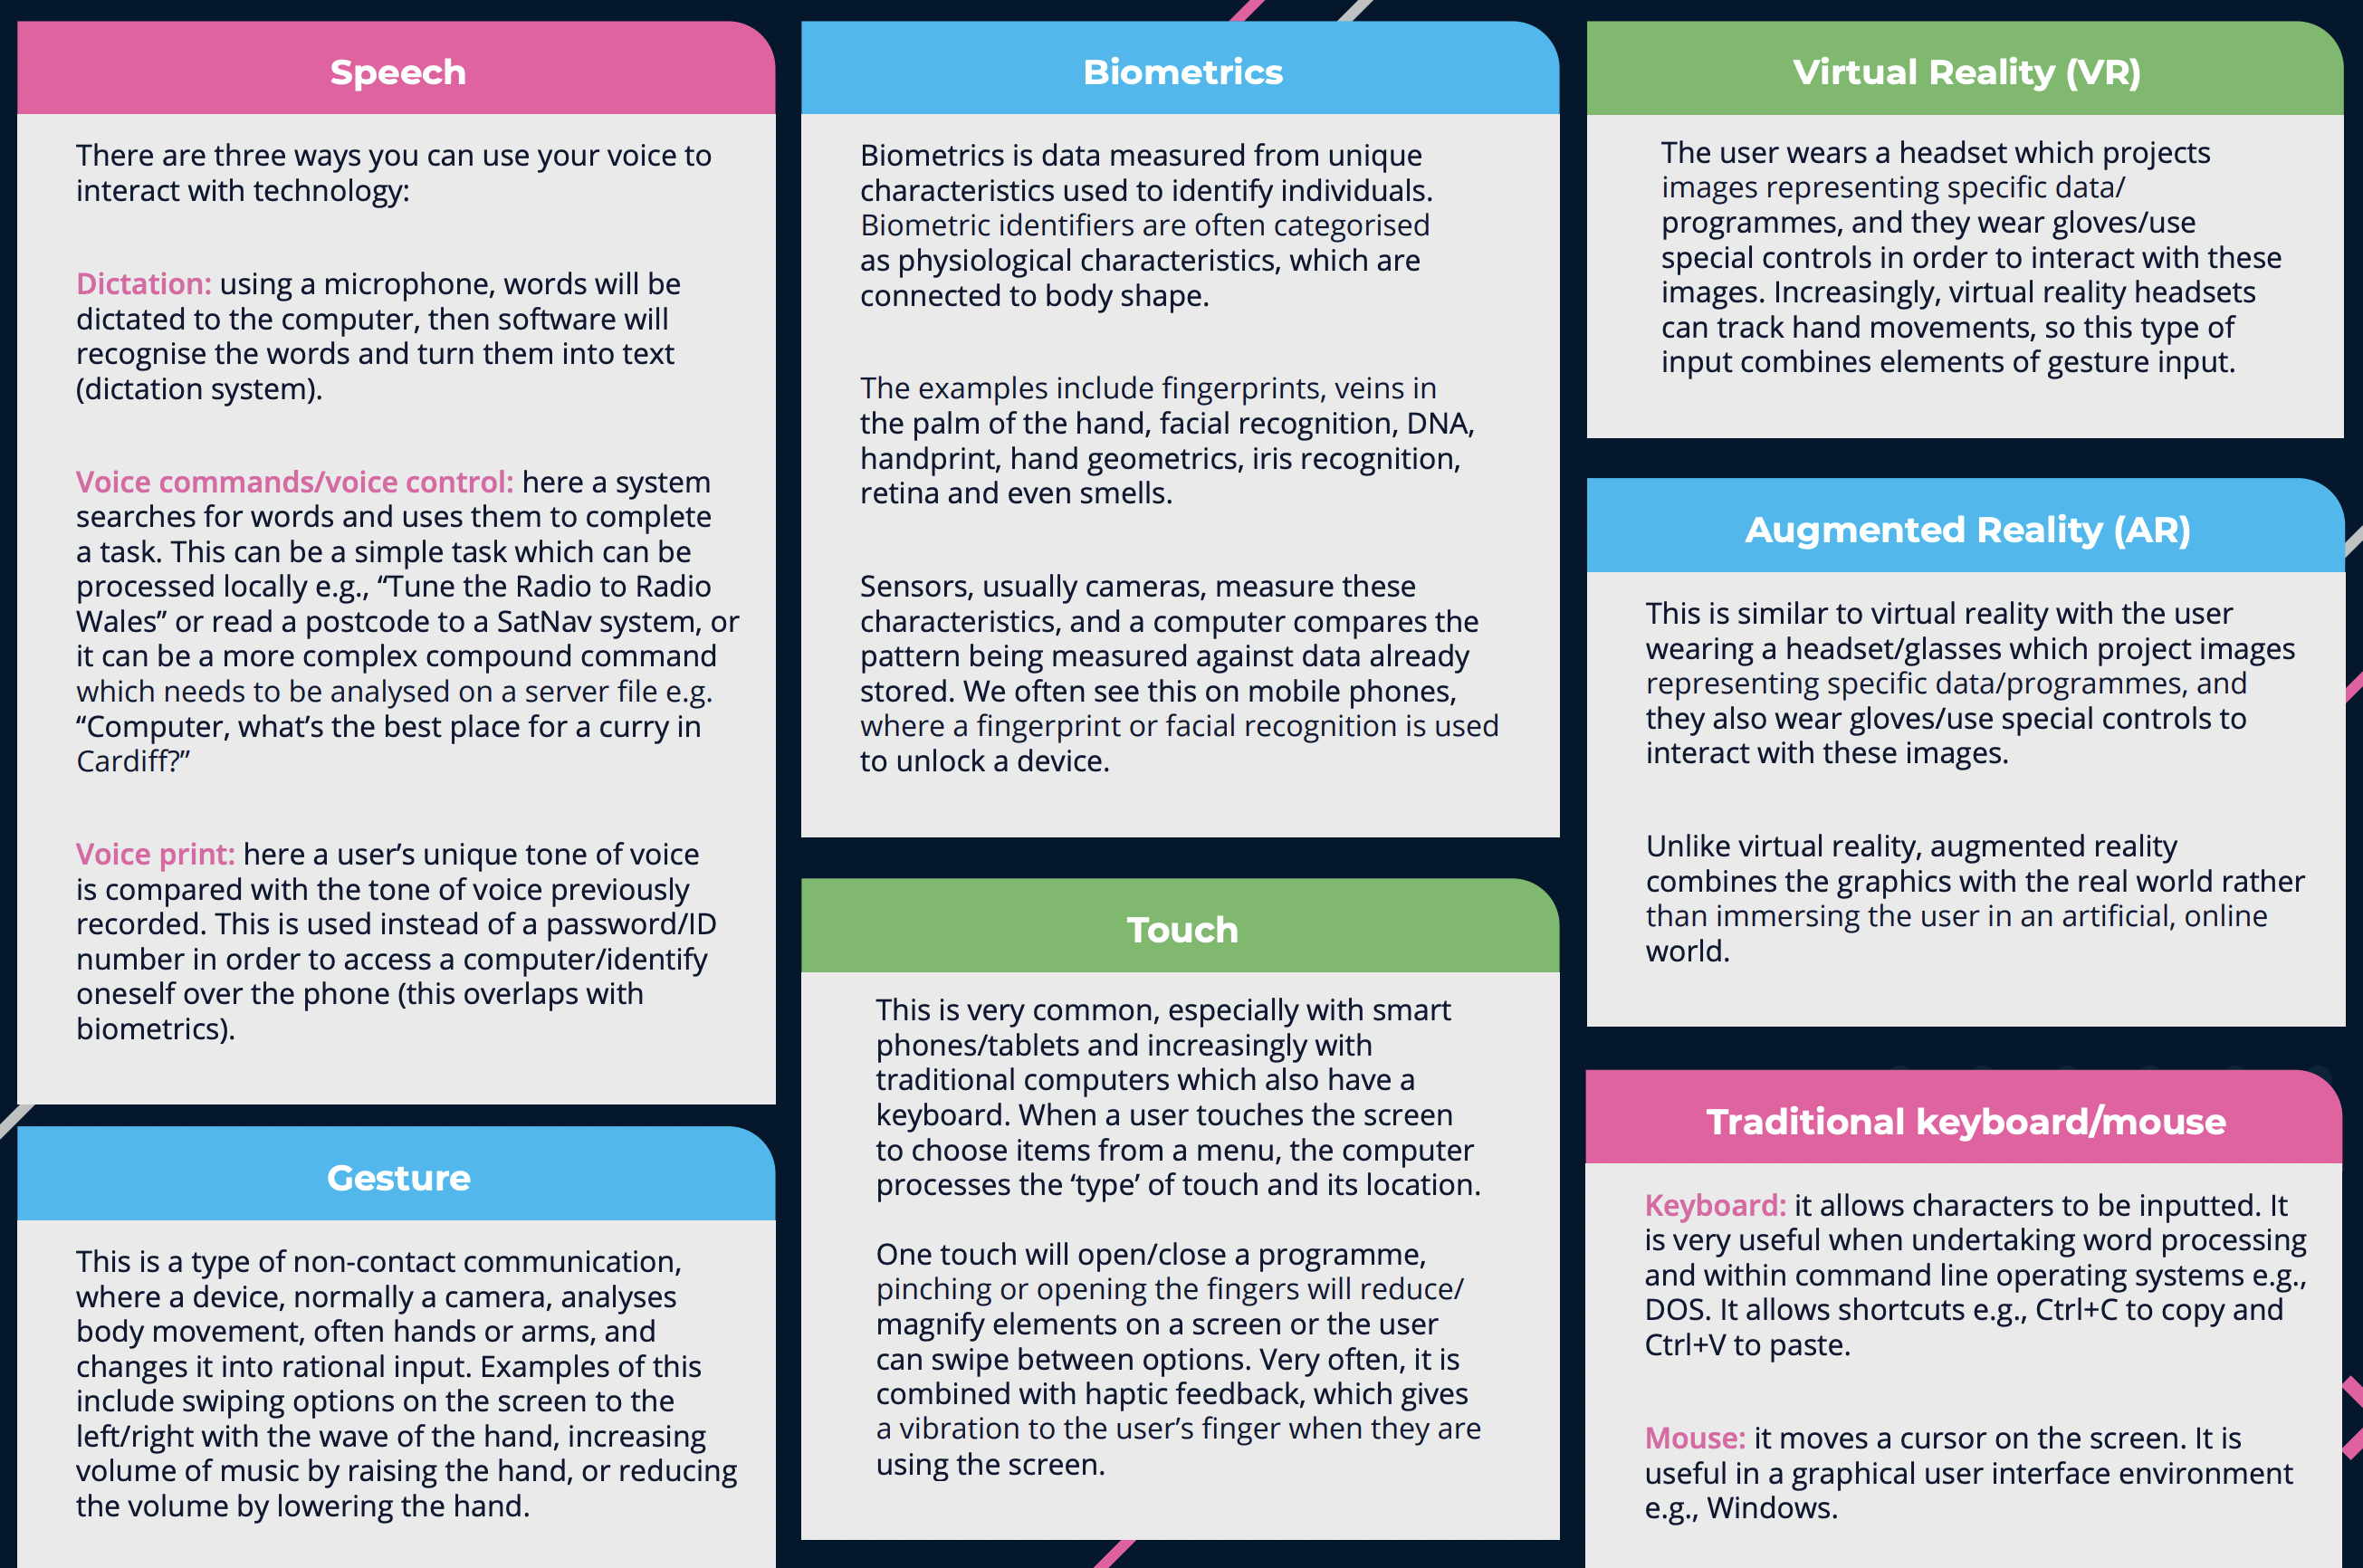
Desktop / Laptop
Mouse
Trackpad
Touch Screen
Keyboard
Microphone
Camera
Mobile Phones
Microphone
Camera
Accelerometer
Sudden Motion Sensor
GPS Data
Project 2: HTML5, P5.js, and OOP (5 Points)
Due: Week 7, Session 2 (Beginning of Class)
Use HTML5, P5.js and Object Oriented Programming techniques to create multiple animated shapes on a canvas that respond to mouse movement. Try to make the shapes chase the mouse pointer, rather than follow it directly. Try rotating shapes such as rectangles or triangles to reflect the position of the mouse.
Requirements:
1. Setup your HTML5 and P5.js environment
2. Create a class with a constructor and methods to build and animate the objects
2. Use the setup() and draw() functions to animate 20 or more objects
3. Use mouseX and MouseY to cause the shapes to respond to mouse movement
4. Try rotating the shapes in response to the mouse movement
5. Try causing the shapes to gravitate toward the mouse rather than following it directly
// Simple OOP example
var sp; // Declare the object

function setup() {
  createCanvas(500, 500);
  background (25);
  sp = new Spot(200,300,100); // Construct the object
}
function draw() {
  background(0);
  sp.display();
}
// function to define a class
function Spot(xpos,ypos,diameter) {
  // Construct the object
  this.x = xpos;
  this.y = ypos;
  this.d = diameter;

  // method to display the object
  this.display = function() {
    ellipse(this.x,this.y,this.d,this.d);
  }
}
Lab 2:In today’s lab let explore vectors and OOP as they might apply to Problem Set 3 and Assignment 2.
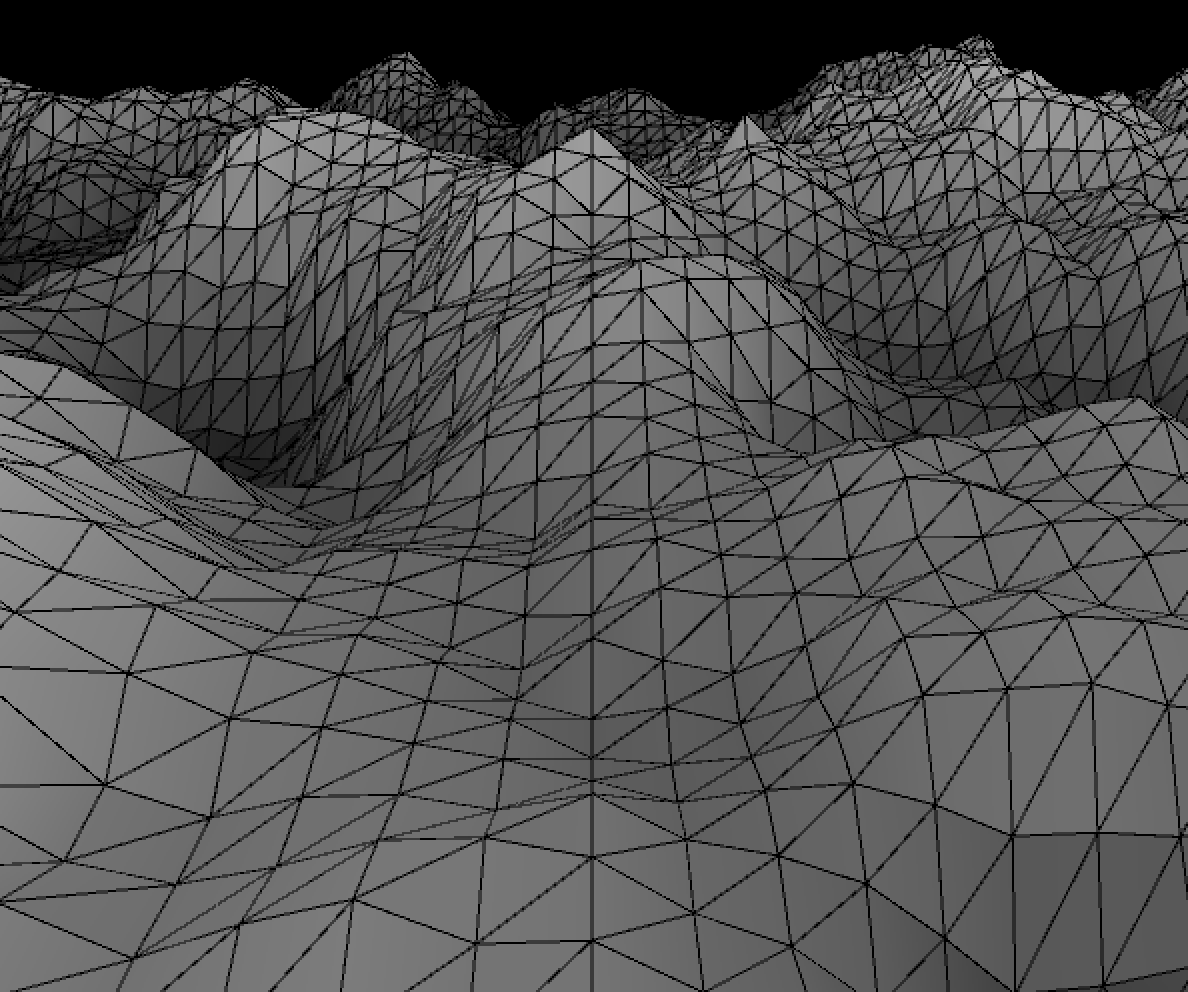
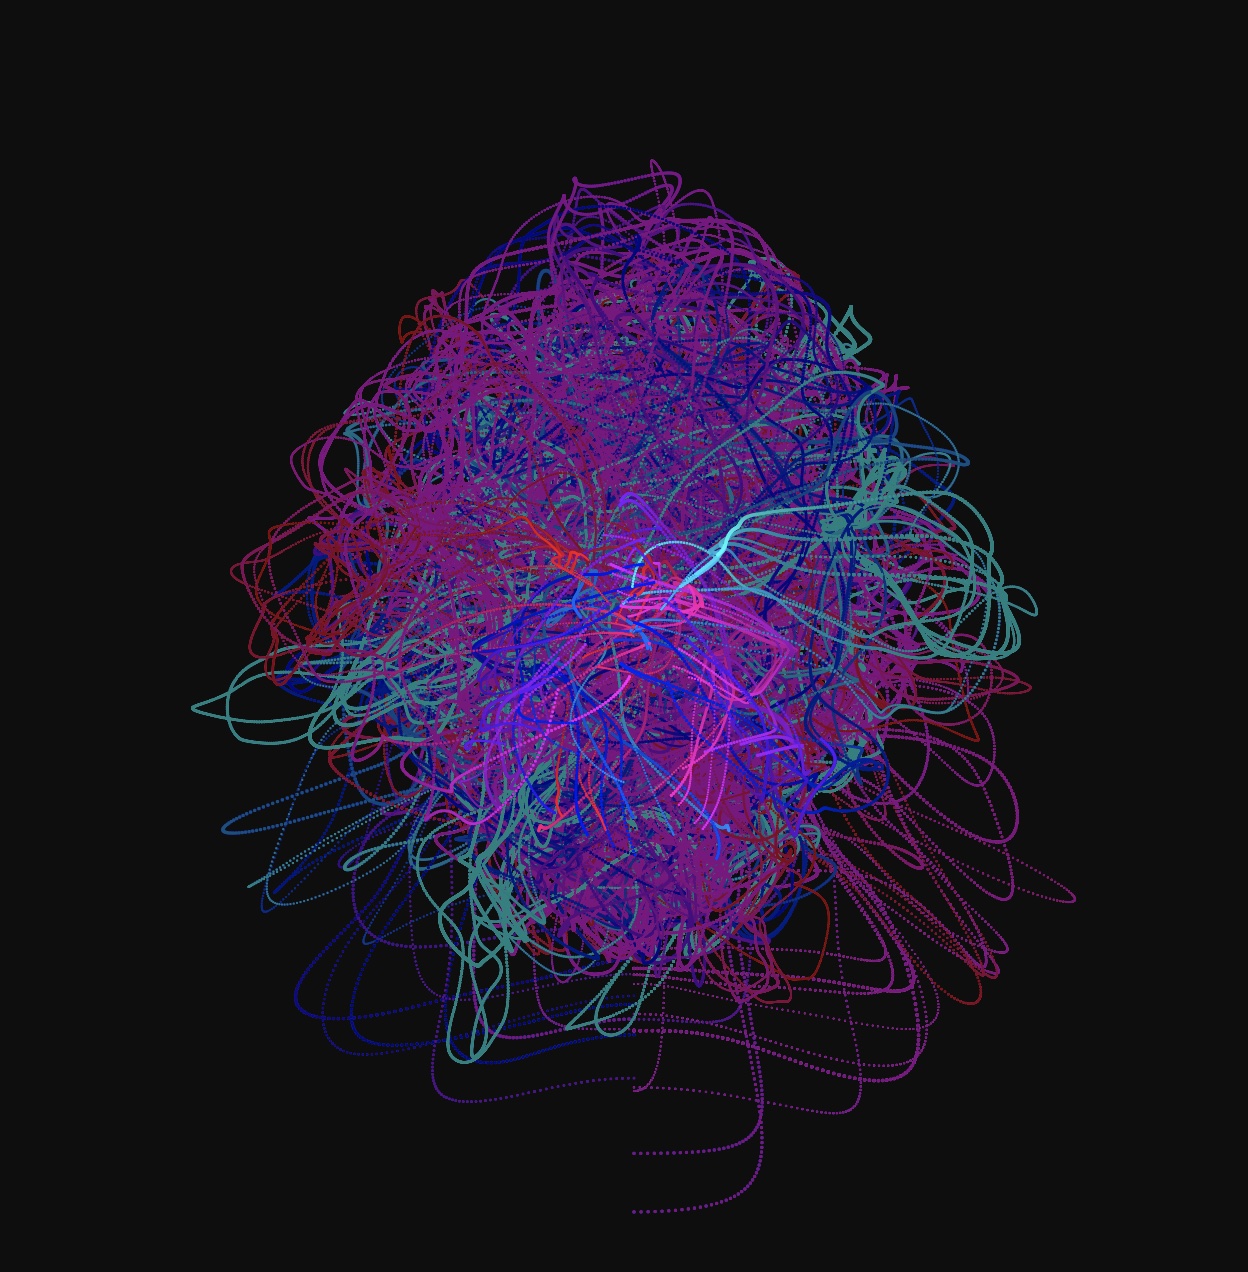
Session 1: Today let’s discuss several P5 functions that allow up to get random values, and the map function which allows us to constrain values to specified ranges. In particular we will start to examine Perlin Noise, named after Ken Perlin.
Lab 1: Let continue exploring randomness and Perlin Noise today during the lab.
Problem Set 4: Random vs. Perlin Noise
Due: Week 6, Lab 1 (3 points)
Use the HTML5 canvas tag and JavaScript, and P5.js to explore the noise function in P5. Try making an object or objects(s) follow a path determined by noise, or mapping / graphing coordinates. Use mouse/trackpad interaction to influence the behaviors.
[noise] Returns the Perlin noise value at specified coordinates. Perlin noise is a random sequence generator producing a more naturally ordered, harmonic succession of numbers compared to the standard random() function. It was invented by Ken Perlin in the 1980s and been used since in graphical applications to produce procedural textures, natural motion, shapes, terrains etc.
1. Problems sets are due by the next lab or the specified due date.
2. Submit answers on Canvas uploaded as HTML, JavaScript, CSS, .zip or otherwise as noted.
3. Solutions to each problem set will be given during demos on the day that they are due.
Session 2: Today let’s look at ways in which we might apply Perlin Noise to arrays of objects.
Lab 2: Let’s expand out Perlin Particles to using two dimensional Perlin Noise.
Session 1: This week we will begin looking at how to implement several sources of interaction. So far we’ve looked at mouse / trackpad controls. Now, let’s take a look at using HTML forms to control objects on an HTML5 canvas. Form fields include text input, radio buttons, checkboxes, drop down lists, and textfields. The P5js library has a DOM section that allows for the listening, selection, and creation of HTML form fields.
Problem Set 5: Using HTML Forms to Control the Canvas
Due: Week 7, Lab 1 (3 points)
Use the HTML forms and P5.js to enable a minimum of five input types that control the canvas. Consider using text fields, radio buttons, checkboxes, select lists, and range sliders. For example: a text field might control the number of objects displayed, a checkbox might be used to pause/unpause or reset the animation, and a slider could be used to adjust the speed, size, or color of the animated object(s).
1. Problems sets are due by the next lab or the specified due date.
2. Submit answers on Canvas uploaded as HTML, JavaScript, CSS, .zip or otherwise as noted.
3. Solutions to each problem set will be given during demos on the day that they are due.
Session 2: Today we’ll start by looking at your HTML5 and P5.js OOP projects. Afterward let’s take a look at DAT.GUI and other JavaScript GUI Libraries.
Lab: Today I will demonstrate what’s required to complete Problem Set 5 and answer your questions. We’ll also continue looking at DAT.GUI and its alternatives. Next week we will dive into using sound and video as a source of input.
Supplemental materials for courses taught by John C.S. Keston at the University of St Thomas